

Who doesn’t love a frosty cold mug of beer on a hot summer day? If you’re enjoying the craft beer craze, you might be curious about brewing your own beer at home. There are many ways to do this, most people buy their hops and start from there, but if you want to get really authentic with the process, it is actually possible to grow your own!
Yes, that’s right. You could actually grow beer in your garden – well, the main ingredient for beer, at least. Just follow these steps to grow your own hops, and then pick up the rest of your supplies at a local homebrew store or even Amazon.
Choose your variety. Some varieties of hops are patented, and not for sale, but there are still plenty of great choices out there. Do your research and decide which type of hops you want to grow. Then, purchase rhizomes from a local nursery or order them from a reputable source online. Rhizomes are the underground stems that put out roots and lateral shoots.
Plant your rhizomes. The main thing to avoid is very cold weather, but we don’t have to worry about that much in Southern California. So, early spring is a good time to plant. Space your rhizomes about three feet apart in a sunny spot, in soil that drains well. Bury each rhizome about 6 to 12 inches deep.
Water your plants. It’s easy to over-water baby hops plants and cause them to rot. So, take it easy, especially at first.
Support your plants. Hops do best when allowed to grow vertically, but they’ll need your help. Keep in mind that fully-grown hops plants can grow as tall as 20 feet! You can build a trellis, or use a simpler twine system. Just make sure you can support the weight of the plants. Hops have been known to grow as much as a foot per day in the middle of summer!
Harvest your hops. Hops will generally be ready for harvest in late August to early September. Check the cones, and if they feel dry and “paper-like,” they’re ready to be used. Simply pick the cones and use them right away, or dry them if you’re not ready to make beer yet. After drying, you can freeze your hops or vacuum seal them.
Prepare for next year. By early winter, you should cut the vines from the plant and then cut your plants down to about one foot tall. That’s all you have to do! Your hops will return in the spring, bringing you more delicious ingredients for your beer.
Whether you’re planning your yard or revamping an existing one, it’s a good idea to drive around and see which types of landscape designs appeal to you. You want an outdoor space that suits your needs, whether you plan to use the yard for recreation, relaxation, socializing, or even growing an edible garden. But beyond practicality, you also need to get an idea of how different landscape designs appeal to you aesthetically.
As you take a look around at other homes or commercial businesses, you’re going to notice something: Landscape designers almost always group several different plants together. Why are these groupings so essential to design? There are a few reasons.
Aesthetics. Variety is much more appealing to the eye than, say, rows and rows of the same thing.
Plant height. If you plant just one type of flower in a bed, you’re going to achieve a relatively “flat” appearance. Plants of varying heights make the design much more interesting. Plus, landscape designers will often group plants of varying heights together, because a shorter, shade-loving plant can benefit from the presence of a taller, sun-loving plant next to it.
Blooming times. You’ve probably noticed that all your neighbors’ azaleas are blooming at a particular time in the spring. Then, a month or two later, something else is providing beautiful flowers. When you group several plants that bloom at different times, you can ensure that something in your yard is always blooming or providing bright foliage.
A little “insurance”. Occasionally, a plant can just fail to thrive. Maybe a pest has invaded the area, or your yard just didn’t provide well for that particular species’ needs. If you planted 50 of the same thing, you’re looking at a dead garden now! But if you varied your plantings, it won’t matter so much if one particular plant just didn’t work out. Your yard still looks okay, and you can replace the failed plants with something else.
For more advice on your landscape design, give us a call. We can help you decide which plants will grow well together, provide years of enjoyment, and add to your home’s curb appeal.
Many people want to try gardening, but they’re living in an apartment or small home without a yard. Maybe they love the idea of growing their own food, but imagine the need for a small farm in order to do so. Perhaps they want to try their hand at exotic flowers, but imagine they need to live in the perfect environment to do so. Container gardening is often the solution to this dilemma.
Even so, you might imagine that herbs or small flowers are the only things you can grow in pots. This isn’t true at all! The truth is, you can grow just about anything in a container. Naturally, a larger plant does need a larger container, but you might be surprised to learn that plenty of people successfully grow things like citrus and banana trees in large pots!
Remember that plants have a growing season and a dormant season. During the winter, you can move your potted plants indoors and place them in front of windows. If you’re growing plants that go completely dormant in the winter, such as dahlias or canna lilies, you can even put them in a dark room or closet and forget about them until the spring.
In March, you will need to fertilize your plants, water deeply, and get them growing again. When the weather is warm enough for each particular plant (depending upon its needs), you can put them back outside again. Just pay attention to the sunlight needs of each plant, and place them in an appropriate spot on your balcony, patio, or yard.
If you’re growing vegetable plants from seed, just place the seeds directly into the pot along with a good-quality potting soil. Choose a pot that will allow enough room for the fully-grown plant, and provide support for plants like tomatoes and cucumbers. You can use a metal “cage” that inserts right into the pot itself.
Finally, since soil in containers does tend to dry out more easily than typical in-ground garden soil, if you do not have them attached to your drip irrigation system, you will need to check your potted plants at least once per day. In very hot weather you might find that you need to water more than once daily. Just put your finger into the soil and if it doesn’t feel a bit damp to the touch, it’s time to water.
For more advice on growing container plants, stop by our nursery. We can help you select plants that suit your space and preferences, and offer advice on pots, soil, watering, and anything else you might need.

You’re building a new home, or perhaps you’re renovating an older one. At some point your focus will turn to the yard, since you’re concerned with curb appeal and the usefulness of your outdoor space. Whether you’re considering installing a lawn or thinking about changing the current one, size is a major consideration.
Remember that the price of seeding grass or installing turf is only the first expense you will face regarding your lawn. Over the years, you will regularly spend time and money on maintaining it; so, this is a decision to make carefully!
A good rule of thumb, in most cases, is that more is not necessarily better. First consider how you plan to use your lawn. Are you providing a place for children to play? Do you have pets? Do you just like the way it looks? You want to provide enough lawn to meet your needs, without installing so much that you spend unnecessary amounts of time and money maintaining it.
If you’re renovating an existing yard, there are ways to gradually reduce the size of the lawn:
• Each year, re-edge the beds and make them about six inches wider.
• Install some hardscape, such as a large patio for enjoying barbecues and relaxation.
• To add curb appeal and make your home stand out, install a large low-water landscaping area.
• Install a water feature and some ornamental plants around it.
• Plant trees, groupings of shrubbery, or flower beds.
• Replace your lawn with an edible or cutting garden.
These are just some ideas for reducing the size of your lawn. While some people still enjoy a large expanse of green grass, a lawn is certainly not your only landscaping option. And since the maintenance can be time-consuming and costly, it really doesn’t make sense to have a large lawn unless it’s a top priority for you.
It is also worth noting that lawns really are going out of style! If you’re looking for a change, give us a call. We can help you decide how to make the best use of your outdoor space, with a plan that suits your budget, maintenance, and aesthetic preferences.

Now that summer has arrived, you might be looking forward to months of delicious homegrown veggies. But of course, you have to get those veggies to grow first, and hot, dry weather can pose a challenge to those of us with backyard gardens. Specifically, you might be wondering how often you need to water your garden.
The simple answer to that question is: However often it needs to be watered!
Unfortunately, nature doesn’t always run on a schedule the way we wish it would. It would be terrific to plant a garden and then let rainfall take care of the rest, but we live in a relatively dry climate. We can’t count on the weather to do the job for us.
You’ll know your garden needs water if you put your finger in the soil, and it feels dry. Yes, that means you need to check it every day. Luckily, that only takes a moment, and then you can water as needed.
One general rule is that gardens need one to two inches of water each week. In most cases, a deep watering every few days is preferred to shallow, frequent watering, but a number of factors will influence your garden’s particular needs.
For example, if your soil is sandy, it won’t hold as much water for a long period of time. In this case, more frequent irrigation will be needed. On the other hand, soil with a high clay content will hold water longer, allowing you to go longer between watering. If you mulched your garden, it will retain moisture much better.
The plants themselves also have varying needs. Young, recently transplanted ones need more frequent watering, and very large plants need more water. When the temperature reaches 85 degrees or higher, your plants might need daily irrigation to keep them healthy. Potted plants will nearly always need daily watering, because their soil dries out so quickly.
Still, it all goes back to that one simple rule: Stick your finger in the soil to test it. If it feels dry to the touch, then your garden needs water. Morning is the best time to irrigate, as less of the water will evaporate, but you can also water in the afternoon if you avoid wetting the leaves. Water at the base of your plants for best results.
In Southern California, it is best to have an automated irrigation system to ensure that vacations, sick family members and long work-weeks do not lead to a dead garden. Simply adjusting an irrigation clock is significantly less time consuming than using a hose or even a watering can.
As always, give us a call if you have questions about your landscaping project. We can offer expert advice to keep your lawn and garden healthy.
Maybe you intentionally purchased a home with a small yard, because you didn’t want to deal with a lot of upkeep. Or, perhaps you’re just trying to make the most of what you’ve got. Whatever the reason, you might find yourself trying to make the most of a small area. If so, you’ve come to the right place, as we have plenty of ideas to help you create a beautiful yard even within strict space constraints.
Think vertically. When you think about the size of your yard, you’re probably thinking horizontally. But your garden can use vertical space, too! Hanging planters can be installed around a porch or patio area, you can use flowering vines along a trellis, and a living wall provides greenery or flowers in a horizontally-challenged area.
Build tiered planters. So maybe you don’t have room for a six-food-wide, lushly planted border. A tiered planter can provide a similar look in a much smaller space.
Choose one focal point. If you only have room for one tree, choose your favorite flowering variety. If you’d prefer a water feature, install a small fountain and plant flowers around it. A small koi pond is another terrific option. The point is to consider what appeals most to you, and build your small backyard garden around that one feature.
Include your porch or patio. Your porch or patio is also part of your yard, and you can garden there, too! A faux-grass rug brings more “green” to the area (without the maintenance). Potted plants and hanging planters offer a variety of options. If you have patio furniture, choose flowered throw pillows, and decorate your tabletops with small terrariums.
Your house is a garden spot, too! Window boxes or wall planters can be used to bring more greenery into a small space, and create a seamless flow between home and garden.
Use inverted planters. If you’re wishing for an edible garden, you don’t actually need acres of space. Use inverted planters for tomatoes and strawberries. You’d be surprised how much food you can grow this way.
For more landscaping ideas that will liven up a small space, give us a call or stop by our nursery. Our experts can advise you on plants that do well in smaller areas, and help you decide what matters most to you. If you build your garden around your top priorities, you can customize a small space to suit you perfectly.
Last week, we discussed some more traditional grass options for lawns. But we also have other options for groundcover, that you shouldn’t overlook just because they’re less common. In fact, many landowners are using Kurapia these days, and it’s growing in popularity due to its suitability to our climate in California.
A low-water option. One of the great things about Kurapia is its low need for water. Anyone who has witnessed our recent drought can testify to the value of low-water landscaping! If you want a groundcover that won’t send your water bill through the roof, or die and look ugly during a drought, Kurapia might be an excellent choice for you. You can use Kurapia with a drip irrigation system, or overhead watering, and its water requirements are much lower than that of grass.
Easy to install. Kurapia plugs are installed in a grid, and from there, it rapidly spreads to fully cover your lawn within around three months. Its thick roots are terrific for erosion control, so Kurapia is a great choice for embankments or other areas where you might be concerned about erosion.
Tolerant of many conditions. Kurapia tolerates a wide range of pH levels, so, in most cases you won’t have to worry about your soil being too acidic. It doesn’t require a lot of fertilization, either, so we can usually install it just about anywhere. A light nitrogen fertilizer in the spring will encourage flowering, if that’s important to you. An application of phosphate-based fertilizer in the fall can help Kurapia retain its lush green appearance through the colder months.
Low maintenance. Kurapia doesn’t spread by rhizomes or seeds. So while it will quickly cover the area where you intentionally plant it, it also won’t invade nearby areas such as your flower garden. Since Kurapia only grows about one to two inches high, you won’t have to worry about mowing it often (or ever, if that height is okay with you).
Excellent weed control. Since it puts out a thick root system, an established lawn of Kurapia will choke out most weeds quite efficiently. It takes some time to establish this system, so good weed control is important early on.
Other benefits. While Kurapia is technically sterile, in the sense that it won’t reproduce and spread into unwanted areas, it does produce small flowers for a few weeks a year. You might enjoy the look of a flowering lawn, but there are other benefits as well. The flowers will draw pollinators (bees) to your yard, which will help keep your flowering and fruiting plants growing prolifically. But if you prefer to keep the bees away, simply mow the Kurapia at flowering time and you’ll still enjoy a thick green carpet.
If you’re interested in this easy, low-maintenance landscaping idea, give us a call. We can answer your questions and discuss your options for Kurapia installation.

If you’re dreaming of a lush, grassy lawn, you will probably read a lot about Bermuda and Fescue grasses. Both types of grass are commonly used as turf on well-traveled areas, from front lawns to soccer fields and even golf courses. But as with any plant, careful research is required so that you choose the right grass for the environment. And, of course, you want to install a lawn that you’re capable of maintaining.
So, let’s compare Bermuda and Fescue grasses, so that you can select the one that’s right for your lawn.
Warm season versus cool season. Warm season grasses grow well in warm weather, but lose their color in cooler weather. Cool season grasses work in the opposite way; they tend to stay green in spring, winter, and fall, but lose their color in hot weather.
Bermuda is a warm-season grass, and grows best in zones 9 through 11.
Fescue is a cool-season grass and does best in zones 3 through 9.
Tolerance for heat and drought. Since we enjoy plenty of warm weather here in Southern California, you want to choose a grass that tolerates heat well. Bermuda grass varieties tend to do well in the heat, while Fescue does not. Bermuda also tolerates drought better than Fescue, and that’s important to us due to the weather in recent years! A lower water requirement can also save you a bit of money on your water bill.
Sunlight and shade. Both Bermuda and Fescue grasses need a sunny environment to grow well. It’s really not recommended that you attempt either of these grasses in a shady environment, but if you do, try one of the hybrid varieties.
Wear and tear. Both Bermuda and Fescue grasses are popular due to their ability to withstand wear and tear. So, you don’t have to worry about the kids ruining your lawn! Bermuda grass is known to be slightly more durable than Fescue, though and can repair itself when damaged by pets or kids.
Maintenance. Common Bermuda and Fescue grasses are both known for creating low-maintenance lawns. Hybrid Bermuda varieties are somewhat more finicky, as they require higher amounts of nitrogen fertilizer. Bermuda grass uses a different (less common) kind of lawn mower. Some people choose to over-seed Bermuda grass in the winter so there is no dormant (brown) period. It is an easy process, but one that is not required for Fescue.
As always, call us if you have any questions about establishing your lawn. We can help you decide upon the right variety of grass for your needs, and give you some tips on maintenance as well.
Do you dream of a lush, flowering garden… but you’ve been cursed by a black thumb? Don’t worry; no one is permanently “cursed” this way! There’s nothing about you that actually causes flowers to wilt in your mere presence. Gardening is a skill that you can learn. Follow these steps to turn your black thumb green, and you can accomplish the garden of your dreams more quickly than you think!
Do your research. You know those little tags that are sometimes included with plants? You’d be surprised at how many people don’t read them! While they don’t tell you everything you need to know, the basic information included on these cards can help ward off most common problems. Check out the plant’s sunlight needs, and make sure it matches the area of your yard where you plan to place it. Also, consider the size of the fully-matured plant, and its needs relating to soil, fertilizer, and water. Ask yourself if you’re able to provide the right environment for this particular plant. Ask the people in our nursery for information about each plant that you’re purchasing.
Start small. Think of gardening as you would any other endeavor: You aren’t going to build Rome in a day. Choose a small spot in your yard for your first garden. A decorative accent around your mailbox, window boxes, or the area around your front porch are good choices. Once you’ve mastered a small garden space, you will feel confident enough to branch out into more ambitious projects.
Get a professionally installed irrigation system. If you’re worried about providing your yard with the correct amount of water (and preventing waste from runoff), you will need to invest in a good drip-irrigation system. We can show you how to program it to suit your needs, and then you never have to worry about watering your garden! You do, of course, need to check the hoses and connections periodically and monitor overall plant health to ensure you are watering well.
Make a schedule. Along with a small amount of daily maintenance, such as watering, your garden should be checked regularly for signs of a disease. Once a month, pruning or fertilizing will also be needed, and each plant’s needs can vary. As you make additions to your garden, add these items to your calendar so that you don’t forget.
Avoid high-maintenance plants. Lovely as they might be, high-maintenance plants will prove to be a nightmare for an inexperienced gardener. You don’t have to cross these off your list entirely; just think of them as a long-term goal to address when you’ve mastered your current landscaping.
Choose hardy, low-maintenance plants at first. Set yourself up for success by choosing plants that aren’t too needy, resist common diseases, and don’t require overly careful pruning. Stop by our nursery, and we can help you sort through your options.
Most of all, don’t give up! Gardening is a fun and relaxing hobby (no really, it is!) so hang in there as you learn the in’s and out’s to the process.

Last week, we gave our readers some advice on setting up safe play spaces in the backyard, but some of you are reaching the other end of the swing set days. Your kids have outgrown the equipment, and the swing set is just sitting there collecting dust and pollen. Now that it’s time to remove it, what will you do about that big, empty spot in the yard?
First of all, take apart that old swing set safely! You can actually hire an experienced “junk hauling” business to do this for you. If you want to do it yourself, remove large parts (such as slides, ladders, and swings) first. Then, work from one end to the other as you dismantle the frame. Pay attention to overheard parts, and how they are attached, so that you don’t cause anything to fall on you while you work.
Now that the swing set is disassembled and hauled away, you will be left with a big, bare spot in your yard. It might even evoke some sad feelings, as you reflect on how quickly the kids grew up… So, turn that spot into something fun for yourself!
Covered patio or gazebo. The spot is already level, so it might be the perfect place to install a cozy sitting area. It can even become the new family fun spot; your kids have outgrown the old swing set, but now they’re capable of hanging out and discussing current events with you.
Koi pond or natural pool. A water feature makes a beautiful, soothing addition to any backyard landscape. Whether you fill it with fish or swim in it yourself, is up to you. As with any body of water, only do this if you have a fenced yard; your kids might be practically grown, but a neighborhood toddler could be enticed by the water.
A vegetable garden. Working on top of any gravel or sand you had installed, you can add raised planter boxes or barrels. This is another activity that the whole family might enjoy, as organic backyard gardening is growing rapidly in popularity.
Outdoor recreation. The kids outgrew the swing set, but you still want to spend time together. Outdoor, over-sized chess boards have become popular in recent years. Other options include croquet and horseshoes. You could even install a sand pit for a volleyball court! The point is to choose something the entire family will enjoy, so open up the discussion at your next family meeting.
Adult Sandbox. For those who had playground sand, pick up four to six Adirondack chairs and build a fire pit. You can evoke a ‘relaxing at the beach’ feel right at home. As an alternative, if the area is a sunny one, you can buy some lounge chairs and soak up some rays.
As always, give us a call and we’ll be happy to answer any questions about your new backyard project.
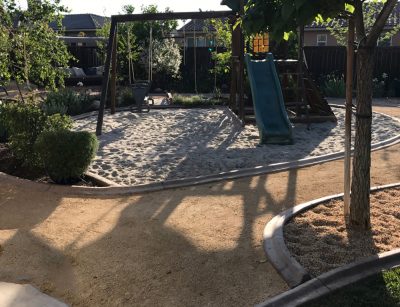
Summer is almost here, and soon the kids will be out of school. Or, if you have grandchildren, maybe they’ll be coming for a visit soon. Like most parents or grandparents, you probably want to encourage them to put down the video games and play outside more. Installing a swing set in your backyard can tempt them to venture outdoors, but of course you want them to be safe as well.
Choose the right spot. Obviously, a swing set requires a level spot in your yard. But here are a few more things to consider when choosing the right spot for a play space:
• Place slides and ladders far from fences, walls or other structures that might tempt kids to climb, or jump from one to another
• Choose a spot far away from any drowning hazards such as a pond or swimming pool
• Watch out for overhanging electrical lines, branches, or clotheslines
• Swings should be twice the height of the swing beam away from other structures
• Choose a shady spot, if you can (or plant some good shade trees)
• Don’t install your swing set over asphalt, concrete, or any other hard surface (watch concrete borders as well)
Set it up safely. Once you’ve chosen the right spot for your swing set, correct installation will help to prevent injuries.
• Check the ground under and around the swing set; remove rocks, stumps, and other hazards
• Position the slide facing north, if possible, because it will receive the least amount of sunlight that way (helping to avoid burns)
• Follow all assembly instructions meticulously; don’t “wing it” if a part is missing, and don’t try to alter your swing set in any way
• Anchor the swing set correctly, if placed on loose or sandy soil
• Create a soft surface to protect against serious falls; wood chips, playground sand and other fill materials are available
• Create a border to keep fill materials in place
Of course, nothing is guaranteed, so always exercise caution when your children are playing outdoors. Review safety rules with them regularly, and make sure to check on them at intervals. You know how children can be; if they’re quiet, they’re probably up to something!
We have designed hundreds of play spaces for kids over the past 15 years and have learned that it’s important to follow the above guidelines to prevent injury and allow the kids to have fun.
Give us a call and we can review your different landscaping options. We have a soft spot for children (and grandchildren) and are happy to help offer advice for incorporating your swing set into your landscaping.

Summer is the time for harvesting lavender, a lovely and fragrant herb you might have growing in your own garden. You probably chose it for its scent, or its gentle purple hue, so you might be surprised at how versatile lavender is!
Once your lavender begins to bloom, you can dry bunches of it to be used in a variety of projects. Or, if you don’t have any lavender in your yard, you can also purchase bundles of it. Either way, check out the enormous variety of things you can do with lavender:
• Sprinkle on your floors, then sweep or vacuum to release the scent
• Make your own homemade soaps, deodorants, and lotions
• Infuse lavender into lemonade, for a flavorful and relaxing summer beverage
• Mix a small amount of dried lavender and fennel into some goat chevre, for a light tasty snack with crackers
• Make sachets for your drawers, to keep clothes smelling fresh
• Use lavender in tea, to soothe headaches and anxiety
• Incorporate the herb into homemade scented candles
• Infuse lavender into water to make your own room freshening spray
• Use the crushed or dried flowers in salad dressings
• Decorate homemade gift cards, shadow boxes and more
• Use lavender in your baking – many cake, bread, and cookie recipes benefit from a small addition of the herb
• Make your own essential oil, to soothe bug bites and assist with a variety of common ailments
• Infuse lavender into apple cider or white wine vinegar
• Mix it with Epsom salt, sea salt, and baking soda for a relaxing bath
• Spritz your pillow with lavender infusion, or place a sachet under your pillow for a restful night’s sleep
• Infuse it into olive oil, and rub into your abdomen to relieve menstrual cramps
• Use lavender water on acne to sooth the inflammation
• Whip up a homemade lavender vanilla syrup, for use over ice cream or in champagne
• Make your own scented massage oil, and treat your partner to a relaxing evening
Believe it or not, these are just a few of the things you can do with lavender! It might truly be the most versatile and useful herbs we know. Of course, you can always purchase bundles of dried lavender, but once you try a few of these ideas you will probably become a little bit addicted! At that point you might want to grow your own.
Luckily, lavender is quite easy to grow yourself. Stop by our nursery and we will be happy to offer expert advice, and help you select the right plants for your herb garden.
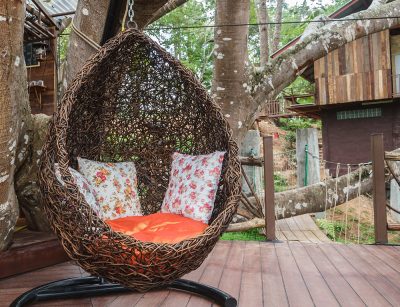
What good is a beautiful, fragrant garden, if you don’t spent time outdoors enjoying it? That’s why we often blog about more than just flowers, trees, and other plants. Creating a space to relax and enjoy your hard work is important, too!
So, picture this: It’s a warm, summer day, and a gentle breeze is blowing. The birds are singing, your flowers are blooming, and you’re kicked back enjoying the view with a lemonade in hand. What better way to enjoy your afternoon, than from a garden swing?
A focal point. A swing makes a terrific focal point for your garden. You can hang it from a pergola, or even paint it a bright color that contrasts with your house.
Decorate it. The swing itself can be decorative (and comfortable) with the addition of coordinating cushions and pillows. If you chose to hang your swing from a pergola, you can plant climbing vines to add a woodsy touch. Some people with larger pergolas like to install curtains for privacy and shade. You can really get creative here, and create your own little backyard hideaway.
Landscaping around your swing. Wherever you choose to place your garden swing, remember that it does serve as a focal point to draw the eye. So, you want to landscape around it in an attractive way. You might choose to build a pebble pathway, leading to your swing. A living wall or a row of bamboo adds privacy. Place a birdbath or feeders nearby so you can enjoy the wildlife.
Keep the kids happy, too. Young children love garden swings, but it can be difficult to relax with small bodies climbing up and down or demanding to swing faster. Installing a fun tire swing nearby will give the kids an outlet for their energy, while preserving your relaxing space for the adults.
Creative options. A garden swing might seem like a straightforward concept, but you would be surprised at the number of options out there! If you check out garden swings on our Pinterest page, you will be surprised at how creative people can be. Some manufacturers have taken the concept a step further, and created swinging beds so that you can nap peacefully in your backyard. You might even incorporate drink coolers and other accessories into your patio, gazebo, or pergola, keeping everything you need within reach.
A garden swing can be as simple or elaborate as you wish! One idea might lead to another, as you create the perfect backyard oasis. As always, we’re here to help with your landscaping needs. Give us a call, and we’ll be happy to answer your questions.
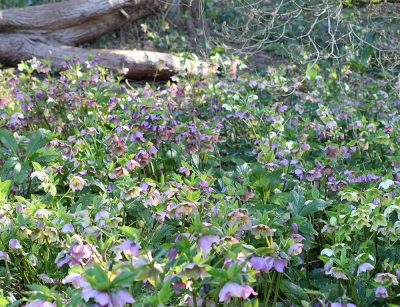
Most of us think of gardens as something beautiful to look at. However, a sensory garden can be designed to appeal to all five of your senses, so that spending time in your backyard can become a relaxing, immersive experience. Since research has shown that spending time outdoors can lower blood pressure and reduce stress, designing a sensory garden could be good for your health.
Ideas for your sensory garden are as limitless as your imagination, but the following tips can get you going. You can come up with some unique ideas of your own!
Appeal to sight.
• When choosing flowers, consider the season and time of day that different varieties bloom.
• Try contrasting shapes, sizes, and colors grouped together.
• Prune cypresses and pines into interesting shapes.
• Use large shrubs or trees to hide unappealing parts of your yard or exterior of your house.
• Incorporate unusual items like wheelbarrow planters, sundials, bird baths, and so on.
• Plant long grasses or weeping trees; their movement is relaxing to watch.
Incorporate soothing sounds.
• Install a water feature such as a fountain.
• Choose plants that produce nectar, or install a bird bath, to attract song birds.
• Hang a wind chime on the porch.
• A textured pathway made of gravel or small pebbles, produces a soothing sound when you walk on it.
• Consider a border of thick hedges, a living wall, and other barriers to help block road noise.
Provide your nose with appealing scents.
• Consider scents when selecting flowers for your garden. Violets provide a subtle scent, lavender is relaxing, and many people enjoy the vibrant smells of English roses.
• Consider spacing when selecting these blooms. You don’t want to be overwhelmed by too many different smells at once.
Create a garden you want to touch.
• We often choose plants based on their appearance, but also consider the way they feel.
• Visit our nursery to discover foliage that is fuzzy, velvety, feathery, and so on.
• Plan both sunny and shady areas, so that you can enjoy soaking up warm sunshine or escaping the heat, as you please.
• Avoid plants with thorns, particularly in sitting areas or along paths where you might brush against them.
Grow a “tasteful” garden.
• Include plants that you can eat! Fresh herb cuttings taste so much better than the dried varieties.
• Consider flowering plants with edible blooms; nasturtiums and violets add a wonderful touch to salads.
• Consider planting vegetables such as tomatoes.
• Plant a fruit tree.
These are a just a few ideas to get you started. Visit our nursery, walk around, and talk to our staff to gather more ideas for your sensory garden. As always, we’re happy to offer expert advice to help you create the garden of your dreams.
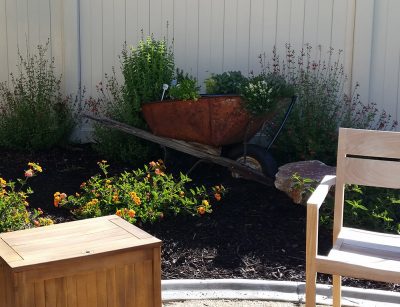
If you visit a home improvement or gardening supply store, you can always find a variety of lovely planters for your garden. But sometimes “found objects” add the most unique and interesting touch to a landscaping project. These can be objects that you already have lying around your tool shed, or things that you pick up at a garage sale or flea market (or even from rubbish that someone else has discarded).
A wheelbarrow obviously serves a purpose in the garden, but it can also become an eclectic found object. If you have an old wheelbarrow, or can obtain one somewhere, you can easily turn it into an eye-catching centerpiece for your garden. Just follow these easy steps:
1. Turn over your wheelbarrow, and drill a grid of drainage holes. The holes should measure about ¾-inch wide, and be spaced three to six inches apart.
2. Cut a piece of mesh to line the bottom of the wheelbarrow. Try an old window screen or a similar material. This mesh will retain the soil as water passes through the drainage holes.
3. Place the wheelbarrow in your garden. You might try a few different spots until you feel happy with its placement. Sure, you could always move it later, but it will become much heavier in the next step.
4. Fill your wheelbarrow with a quality potting soil.
5. Place your choice of flowers or other plants in the wheelbarrow. This is your time to get creative! You can choose a mix of different-colored flowers or foliage that appeals to you. Just keep in mind the spacing guidelines for each plant, and remember that some tend to spread quickly and “choke” anything it its path.
6. Add a layer of mulch around your plants, about two to three inches deep. This will help retain moisture on hot, dry summer days.
7. Maintain your wheelbarrow planter just as you do the rest of your garden. Remember to check the soil for dampness, and water as needed. If you chose a plant that spreads quickly, you might need to periodically thin it out, so the planter does not become overcrowded.
That’s really all there is to it! For more ideas, please stop by our nursery and we can help you select just the right plants for your project.

There’s nothing quite like a bouquet of roses, whether you’re presenting someone with a romantic gift or simply want to enjoy them in your home. Creating a rose bouquet involves much more than simply gathering a bunch of blooms! There are a few secrets to creating the perfect bouquet.
First, we tend to be partial to English roses, especially those from the amazing breeder David Austin. He first created these roses by crossing different species of roses to attain the brightest, repeat-flowering blooms along with the strongest fragrances. So, we always recommend these rose bushes due to their long blooming season, uniquely beautiful flowers, and lovely scents. If you plant them in your garden, you can also cut the flowers to use in bouquets.
Having said that, now that you’ve chosen English roses for a bouquet, how do you go about arranging them?
First, keep your vase in mind. How tall is it? As you cut flowers for your arrangement, make sure to leave plenty of stem. Use a diagonal cut at the bottom of the stems, and cut your flowers just a bit longer than they need to be (you’ll see why in a moment).
Now, remove leaves from the stems. Any leaves that are submerged in water will rot, and cause problems for your bouquet. So, you want to trim any leaves that will be touching the water, once your flowers are placed in the vase.
Mix flower food and water in the bottom of your vase, and add your blooms. Arrange the tallest cuts in the center or back of the arrangement, and balance blooms according to size (and color, if you’re using multiple colors). Allow the stems to fall naturally against the sides of the vase, and then continue to rearrange them until your bouquet is nicely balanced.
Roses will stay fresh for about seven days, but here’s a little secret that will maximize the life of your blooms: change the water in your vase about every two days. As you do this, re-cut your stems under running water. Just trim off about a quarter of an inch, and they will better absorb water and stay fresh a bit longer.
As always, give us a call or stop by our nursery if you have any questions about growing roses. We offer a large selection of English roses, and can help you select a variety that suits your preferences.

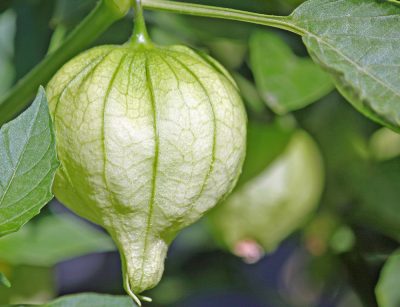
If you would enjoy a garden full of flamboyant blooms with a tropical look, canna lilies might be an excellent choice for you. These perennial flowers are available in a variety of different colors, and they sport large paddle-shaped leaves. The plant itself is lovely, and would make a terrific addition to your landscaping even if they never bloomed! Fortunately for all of us, canna lilies do indeed bloom, all the way from late spring to early frost in most cases.
How to plant canna lilies from tubers. Some gardeners do grow canna lilies from seed, but this is often a difficult process. Unless you’re an expert, we advise purchasing and planting the tubers or bucketed plants for more consistent results.
Canna lilies require a lot of sunshine, so choose a sunny spot in your garden. Loosen your soil to about a foot in depth, and mix in compost. Then dig holes about two to three inches deep, spaced one to four feet apart, and place your rhizomes in the holes. Yes, they really do need to be placed that far apart from one another, as rhizomes send out lateral shoots and spread quite prolifically underground.
Now, water thoroughly, and keep in mind that canna lilies require moist soil. Since our climate is quite dry here in Southern California, check your plants regularly and water them freely. Mulching underneath them will help to retain moisture as well.
How to care for canna. To keep your canna lilies blooming throughout the season, remove dead flowers promptly. This will promote continuous flowering so that you can enjoy your lilies all summer. Once autumn arrives and your canna lilies stop blooming, you will notice the foliage blackening. At this point, you can cut each stem to the ground.
Cannas spread underground by sending out lateral shoots. Over time, your plants can become congested. Every three to four years, dig up the root clumps, carefully separate them, and replant them spaced at least a foot apart.
A few things to remember. Canna lilies are relatively hardy in our climate. However, they can be prone to problems like leaf rot, bacterial blight, and rust. Slugs, snails, caterpillars, and spider mites also enjoy munching on canna lilies. Monitor your plants carefully for signs of these problems, and contact us if you have any concerns. When treated early and correctly, these health problems can be corrected.
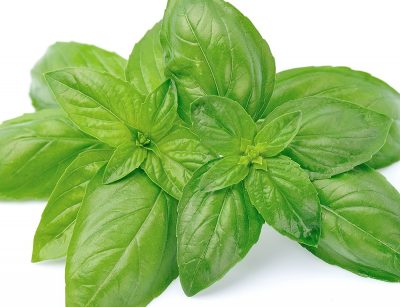
Talk to any foodie or experienced cook about their favorite herbs, and basil is sure to receive an honorable mention. Basil is highly versatile, adding a delicious flavor to an enormous variety of dishes. But one reason basil is so useful is that there are so many different types of it! You might be planning to grow basil in your garden this spring, but researching it first will help you choose the type that will best suit your needs.
Genovese. This is one of the most common sweet basil varieties, and probably the one that is most familiar to you. Genovese Basil is used in Italian cuisine like sauces, soups, and pesto.
Thai. Thai Basil infuses dishes with a spicy flavor, like anise and cloves. It’s a must for your garden if you enjoy cooking Thai food, or similar cuisine, at home.
Spicy globe. This variety adds a spicy flavor to salads, pastas, and pesto’s. It isn’t spicy the way a pepper is spicy, though, so don’t be afraid of it!
Dark Opal. These basil leaves are a deep purple color, so you might choose this variety for the hues it adds to arrangements (or to your garden in general). However, Dark Opal Basil also lends a spicy touch to salads, garnishes, and pesto.
Lime. Lime Basil is what it sounds like. Its lime flavor provides a terrific touch to fish or chicken recipes, and you can even infuse it into a syrup to be used in margaritas.
Lemon. Like Lime Basil, Lemon Basil tastes exactly as the name implies. It also makes a good addition to chicken or fish dishes, and can be used in salads. On a hot summer day, throw a sprig into a glass of cool iced tea.
Holy. Holy Basil is revered by many Hindus, due to its immune boosting properties. If natural plant medicine is your thing, try infusing Holy Basil leaves in a tea.
These are just some of the more common varieties of basil. While they each carry a unique flavor, most are relatively easy to grow and harvest. Prune a few leaves from the tops of your plants regularly, to keep them healthy and encourage more growth. And as always, provide your plants with the sun and water conditions specific to their needs. They will thank you!
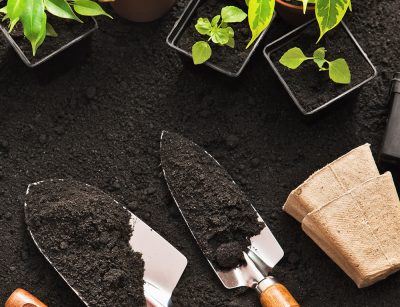
More and more people are growing their own food at home, due to concerns over food safety and freshness. Plus, growing vegetable crops is a fun and valuable skill to learn! However, growing vegetable crops can also be overwhelming for the beginner. What if you invest time and energy into a crop that doesn’t produce well? Or, what if you grow one crop, like cucumbers, and you get tired of the abundance by summer’s end?
Growing a salsa garden is a good solution to those problems. The necessary crops are relatively easy to grow, and you can put away jars of salsa to be used throughout the year. You can also use the ingredients in other dishes, so you’re less likely to get tired of them.
What to plant in your salsa garden. These plants are easy to grow, but don’t feel like you must grow them all yourself. You could pick up a little garlic at the store, for example, or you and a neighbor could split responsibilities.
• Tomatoes
• Peppers – jalapeno, habanero, sweet, or other varieties depending upon your preferences
• Herbs, such as cilantro
• Onions
• Garlic
• Anything else you like in salsa – feel free to experiment!
These crops can be planted in the spring, but look at their maturity times. Tomatoes, for example, take about sixty days to begin producing. Cilantro is a fast-maturing crop, so you might want to start new seedlings every few weeks to ensure a continuous supply all summer.
Here in Southern California, we should plant some crops (like garlic) in cooler months. The crop is ready to use in the early summer months but you can dry and save it for later. When stored correctly, garlic stays fresh for months. You might wish to do this if space is limited.
Where to grow your salsa garden. Speaking of limited space, the great thing about all the above crops is that you can grow them in smaller spaces. You can opt for a traditional backyard garden, either in a raised bed or barrel, if you have a sunny spot available. However, you can grow an entire salsa garden in pots, on a balcony or patio if you wish.
As always, stop by our nursery if you have any questions about growing tomatoes, peppers, and the other plants listed above. We can help you choose plants that fit your needs, and offer expert advice to keep them healthy and productive.
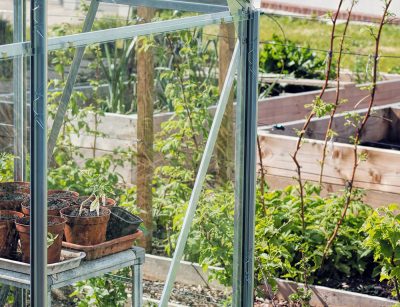
Commercial plant growers have always used greenhouses because they needed a controlled and protected environment to raise flowers and food crops. This allowed them to continue production year-round, no matter the weather or region.
Recently, though, you might have noticed small greenhouses popping up in your neighbors’ backyards. You might be wondering why so many people have developed a sudden interest in greenhouses. You might even be considering one of your own.
Do you need a greenhouse? For the home gardener, a greenhouse serves two basic purposes. It will allow you to protect your plants from intruders like rabbits, birds, and other pests. Plus, a greenhouse gives you more control over growing conditions. You can extend the growing season by avoiding cooler temperatures, and you can retain more moisture in a dry climate.
Aside from those two practical reasons, backyard greenhouses are becoming more common because more people are growing their own food. If you’re concerned about pesticide use, freshness, and quality control, a greenhouse can allow you to grow more of your own food at home.
How to use your greenhouse. Depending upon your exact needs, a greenhouse can serve the following functions:
• Extend the growing season, so that you can grow cool or warm-weather crops for longer
• Grow crops year-round if you choose an insulated or heated greenhouse
• Start seedlings to be transplanted outdoors later – the greenhouse protects them from the elements until they’re large and hardy enough to be moved
• A greater success rate – a controlled environment means more of your plants will thrive
Greenhouse options. Since greenhouses can serve a variety of purposes, it makes sense that you have many different purchasing options. A smaller greenhouse is ideal for starting seedlings to be move outdoors later, whereas a larger greenhouse can be used to grow full-sized plants. You can also choose from “hot house” greenhouses, warm greenhouses, and cool greenhouses, depending upon your temperature needs.
Ventilation and insulation are the two main considerations for choosing a greenhouse. You want the structure to remain warm enough in the winter, yet avoid overheating in the summer. For this reason, greenhouses are available in a wide variety of materials, and you can add features based upon your needs.
Since a greenhouse is a significant investment, don’t just order the least expensive one you see online. First analyze your needs, and ask yourself how you will be using the greenhouse. Then, give us a call and we can help you choose a structure that will perform as needed.

For just about any home improvement project that you can imagine, it would be simple enough to head to your nearest hardware or landscaping supply store. There, you will find everything you need to complete your project, but sometimes it’s more fun to create unique touches for your home and yard. You can personalize them, so that the result is a one-of-a-kind design. Plus, the whole family can get involved! Home improvement projects are a great way to spend time together and learn something new.
If you’re looking for a fun, easy way to personalize your landscaping, why not create your own stepping stones? This project doesn’t require a lot of special equipment, but the results can be creative and exciting.
Step One: Choose a container to use as a mold. You can pick up plastic containers at a discount store, or perhaps you already have something you can use (large dog food dishes are a good example). Choose something that is a few inches deeper than the desired thickness for your stones.
Step Two: Fill the bottoms of each container with a layer of slightly damp sand. About an inch is plenty.
Step Three: Get creative! This is the fun part. Choose items that will create a decorate design when pressed into concrete. Consider seashells, leaves, flowers, and so on. Place your decorative items on top of the sand.
Step Four: Prepare a bag of Quikrete according to instructions. Once your Quikrete is ready, pour it into your containers and use a spatula to level the tops.
Step Five: Let your stones dry for two to three days. Once you’re sure that the stones are completely dry, pop them out and admire the results! Place them around your garden for a special touch to your landscaping.
If you’re looking for ideas, check out our family Pinterest board!
If you’re building a new home, or just purchased a fixer-upper, you might be facing some big decisions about your yard. It can be tempting to go the “simple” route, put down a carpet of grass, add a few of your favorite shrubs, and be done with the whole thing. But you won’t achieve a very attractive result that way, and you could be missing out on an opportunity to add value to your home. There are several reasons that a more varied landscaping design is recommended for any yard.
Insurance against disease. Let’s say that you’ve chosen a plant that you love… and you’ve placed it all over your yard. If those plants fall victim to a fungus or some other pestilence, you could be left with a barren landscape. Variety helps to ensure that most of your landscaping survives such a problem. This is especially important to consider when choosing trees.
Conditions vary throughout your yard. Some spots in your yard are completely sunny, while others may be partially shaded. Planting a variety of plants helps you to take advantage of ideal growing conditions for each species.
Keep your yard looking great all year. The foliage and blooms of individual plants will vary throughout the year, per season. If you only plant one or two things, your yard will only look good for part of the year but will fall flat for other seasons. A wide variety of plant species keeps your yard attractive throughout different seasons.
It just looks better! A more varied landscaping design produces a more beautiful result. Since landscaping adds curb appeal and dollar value to your property, it makes sense to invest in trees, shrubs, flower beds, and so on.
Remember, a varied landscape doesn’t have to equal hours of maintenance. If you’re worried about upkeep, give us a call, and we can recommend low-maintenance landscaping options. We can also help you select hardy plants from our nursery, and offer expert advice on placement in your yard.

So, you must cut down that old, sickly tree, or perhaps, you’ve lost one due to a storm. Whatever the reason, you might find yourself wondering if there is anything you can do with the stump and leftover logs. There are plenty of creative ways to recycle parts of your fallen tree.
Make planters. Depending upon your method, this could get a bit labor intensive. You’ll need to hollow out to stump by chipping and scraping out the center of the stump with a sharpened mattock. If a large tool intimidates you, you could try using a smaller pick or even the claw end of a hammer. After hollowing the trunk, drill some drain holes angling down and out, to prevent rot. Then just add soil and plant the flowers or herbs of your choice. The work is worth it! The finished product is beautiful and unique.
Birdbath. Choose a large, decorative bowl, and affix it to the top of the stump. Just add water, and now you’ve created a birdbath that fits effortlessly into your landscaping.
An end table. Remove the stump, sand the top until smooth, and decorate it any way that you like. You could stencil it, or glue colorful mosaic tiles to the top. Now you’ve created a beautiful accent table to use alongside your patio furniture.
Entertain the kids. Smooth the top of the stump, and paint it with chalkboard paint. Kids can draw on it or play tic-tac-toe, while getting some healthy sunshine and fresh air. If you have an abundance of leftover stumps and logs, arrange them into an obstacle course for the kids (and it’s fun for adults too). Add large rocks, a rope swing, and other elements to create a fun and natural play space.
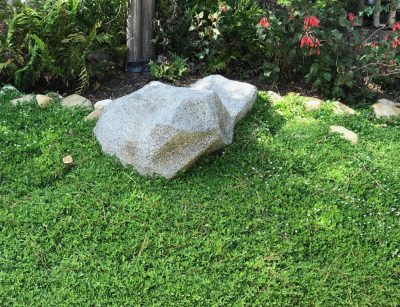
Use it as a base for a sculpture. A tree stump is the perfect spot to place a gazing ball, or you could build a small “fairy garden” on top. Use animal or mushroom figures, a little moss, or even tiny houses and bridges. Get creative!
Create a walkway with stepping “stones”. Use a chainsaw or band saw to slice a tree stump and logs into disks measuring about two to three inches thick. Keep in mind that this can be very dangerous work, and it might be wise to hire a professional! Once you have your disks, arrange them along your walkway and fill in the spaces between them with dirt or pebbles.
As always, contact us if you need help with any landscaping project. We can offer creative ideas, quality materials, and help with labor if needed.

Rose bushes provide a beautiful accent to your landscaping, and you will enjoy their lovely aroma throughout the blooming seasons. Some gardeners enjoy cutting roses and bringing them indoors to create floral arrangements throughout the home, while others press the blooms and use them in craft projects. But there’s another terrific way to use your roses: Rose water! It is one of the most useful home remedies for many health conditions, and it’s surprisingly easy to make!
Here are just some of the more popular uses for rose water:
• Controlling acne breakouts (just spritz it on your face)
• Balancing your skin’s pH levels
• Smoothing the skin, lessening the appearance of fine lines
• Tightening pores
• Slowing the aging process
• Calming anxiety
• Soothing sunburned skin
If you want to make your own rose water, remember to use blooms that have not been treated with chemicals such as pesticides. Harvest fresh blooms early in the morning, to capture them at their most fragrant, and use them right away.
Next, bring a small pot of spring water (about five ounces) to a boil. Then add a handful of rose petals, cover the pot, and simmer until the petals lose their color. If you want to make a larger quantity of rose water, just adjust the above measurement accordingly.
Allow the rose water to cool completely, and strain into your desired container. If you’re using the rose water for your complexion, pour it into a small spritzing bottle. Your rose water will stay fresh for about seven days if you keep it at room temperature, or up to a month if you store it in the refrigerator.

Who doesn’t love a refreshing cocktail after a long day at work? For some people, a sipping a favorite cocktail while lounging on the porch is a great way to unwind. For others, experimenting and creating new cocktail recipes is practically an art form!
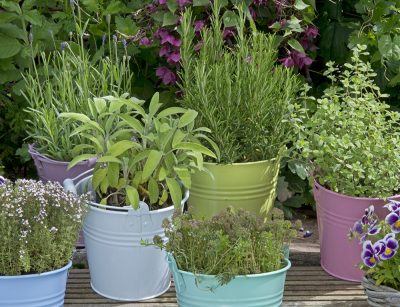
For amateur mixologists, pricey herbs can be an obstacle to the hobby. You might find yourself purchasing several different herbs to use in your recipes, only to feel dismayed when they wilt before you can use them all. Or, you want to plan a cocktail party, but buying four or five different herbs can be a bit expensive.
One solution is to grow your own herbs in your home garden. Now you can snip off just the amount of leaves that you need, while the plant continues to grow and provide a flavorful touch to future recipes. You can’t get much fresher than that!
Mint. If you grow just one herb for use in cocktails, this would be the one. This plant can be quite prolific, so grow it in containers unless you’re prepared to have an abundance of mint everywhere! Use it in mint juleps, mojitos, or your own original recipes.
Rosemary. Rosemary grows well in dry climates, making it a terrific choice for our sunny environment. The rich, woodsy flavor adds an interesting touch to gin and vodka, or whiskey sours.
Basil. Basil has enjoyed a surge in popularity in recent years, and is featured in many summer cocktail recipes. Basil does need plenty of water and sunlight, so place your plants in a sunny spot and remember to irrigate it regularly. When you’re ready to use basil in a recipe, take leaves from the top of a plant so that healthy growth will continue.
Sage. This earthy herb carries a strong, distinct flavor, so use it very sparingly. It’s easy to grow and requires very little care, so long as the soil is well drained. (Tip: Some people are very sensitive to the overpowering taste of sage, so you might want to ask guests how they feel about it before mixing leaves into a drink).
Lavender. Lavender grows well in containers, making it another good choice for those with less garden space. It does require regular watering, but make sure your container drains well. As with sage, a little goes a long way, but lavender can be great fun for mixologists who love to experiment. It is also great for virgin Lavender Lemonade!
As always, contact us or stop by our nursery if you have questions about growing herbs. We’ll be happy to help!