
Who doesn’t love a fresh bouquet of flowers on the dining room table, or displayed on the mantle? Of course, the downside of fresh arrangements is that they don’t stay fresh for long. You need to consistently replace them, whether with plants from your own garden or by purchasing fresh flowers.
An alternative is to simply grow a “living” centerpiece, a potted masterpiece of your own creation! If you choose the right plants, a living centerpiece can add beauty to your dining room, patio table, or any other area of the home for years.
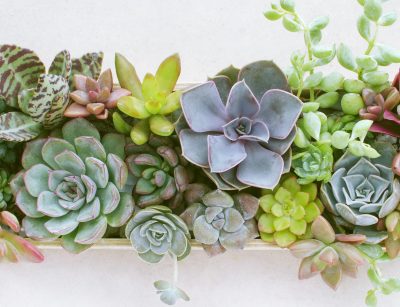
The best way to accomplish this goal is with succulents. These grow best in bright, indirect light, and they don’t require frequent watering.
Since you’ll be looking at this centerpiece for years, go ahead and choose a container that you love. Now is not necessarily the time to choose a plain, low-cost container unless that’s what you truly prefer. Shop around and find something you love!
Now, choose a variety of succulents such as echeveria, stonecrop, or hens-and-chicks. We have plenty of options at our nursery, so stop by for a visit and we’ll help you choose plants that you will love for years.
As you make your selections, try to vary your plantings by texture, size, and color. You can view this living centerpiece as a work of art that you’re constructing, and as with art, you will want to balance all aesthetic elements so that they blend and complement one another.
After constructing your living centerpiece, you will find that its care is quite simple. As long as it receives plenty of indirect sunlight, and the soil doesn’t stay damp, your plants should thrive and add beauty to your home for years.
Have fun with your project, and remember we’re here to help. Just give us a call and we’ll be happy to answer your questions.
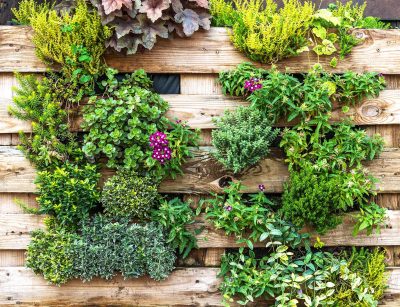
When time, money, or space are limited, you might feel tempted to put off any improvements to your garden or outdoor living area. However, there are many ways to add smaller, easy upgrades without investing a lot of time or money into the project. A vertical pallet garden is one such addition; it requires very little space or time, and you can accomplish this project by repurposing an old wood pallet!
First, select a pallet that is appropriate for this use. Inspect it for signs of rotting, and look for an HT stamp somewhere on its structure. This stamp indicates that the wood was heat treated, rather than preserved with chemicals.
Once you’ve selected the right pallet for the job, simply mount it to the wall of your choice. Remember that you’re essentially creating a “living wall”, which can serve as a sound barrier as well as a space to grow plants. So, you might wish to utilize this project to block unpleasant noise from the road or neighbors.
Also, consider what type of plants you hope to grow in this pallet garden. You will choose full sun or partial shade plants depending upon where you’ve placed your living wall.
Now, line the pallet’s horizontal slats with landscaping fabric to form planting pockets. Staple the fabric securely to the sides of the pallet, keeping in mind the eventual weight of damp soil.
Next you will fill your pockets with potting soil, and plant flowers or herbs of your choice. Keep in mind that vertical gardens, especially those in full sun, drain quite well. Since the soil will dry quickly, you should choose plants that prefer well-drained soil like Mediterranean herbs and drought-resistant succulents.
If you’re determined to grow more “thirsty” plants, you still can. Just make sure to water very regularly, or consider attaching your vertical garden to a drip irrigation system.
Give us a call, and we can advise you on plants that will grow well in a vertical garden, and answer any other questions you might have.

As you plan your hardscaping project, you will discover that for just about any look or purpose you want to achieve, there is a way. Often, there are multiple options to accomplish your goals. Sorting through the different materials available to you will become one of your primary tasks, and though it can feel like a chore, choosing the right materials for the job is of utmost importance.
So with that being said, you might be wondering about the benefits of natural stone facing over pre-fabricated surfacing materials.
Strength and durability. It won’t surprise you to hear that materials made of stone are incredibly resilient. Stone will resist cracking, chipping, scratching, swelling, warping, and weather damage. In fact, stone is so tough, you would have to make a concerted effort to damage it – and even then you probably wouldn’t succeed!
Long-lasting. If you’re investing in an improvement to your home, you want it to last a long time. That’s no problem for stone facing materials. Some of the oldest structures built by mankind are still standing, and it’s because they’re made of stone!
Aesthetic appeal. While many pre-fabricated materials are quite attractive, you cannot perfectly match the look of natural stone. Stone lends an earthy, organic quality to your project, and blends well with any type of decor. And yes, you do have some options with regard to color.
Sustainability. Stone is one of the most abundant materials on earth, so it can be sourced quite easily and the environmental impact is much lower. And while stone structures can last thousands of years, technically the materials could be reused in another project one day. You can’t really say that of pre-fab materials, which are thrown away when the structure is eventually dismantled.
These are just some of the primary benefits of natural stone materials. For more information, contact us and we’ll help you evaluate whether stone is right for your hardscaping project.
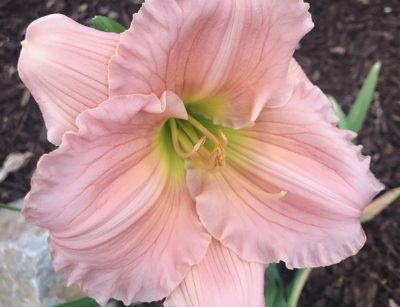
Due to their striking beauty and ease of growth, daylilies are a common component of many gardens. You can certainly take the laid-back approach with these perennials, allowing them to do their own thing without any specialized care. However, they will bloom more weakly and die off more quickly if you go this route.
By contrast, you can get far more bang for your buck by providing a bit more specialized care to your daylilies. Follow these easy instructions, and you will enjoy more of these bright, impressive blooms throughout the season.
In early spring… Provide your daylilies with a weed-free compost and a little organic fertilizer. Continue to feed every two to three weeks, with a liquid fertilizer, throughout spring and summer.
In the heat of summer… Check soil moisture, and water your daylilies when needed. They will often go dormant during the hottest part of summer, and won’t look nearly as impressive unless you provide care.
As flowers die… Cut back the stems as low as possible. This helps the plant conserve energy which can be better spent on producing more flowering stems.
When foliage dies… You can cut it out, but the process might be tedious. Another option is to wait until it dries completely, and then you can pull it out with a gentle tug. If all of the foliage is looking tattered, use a string trimmer to cut it back to a few inches tall. Rake out the dead leaves, water, and fertilize. New growth will appear in about one week.
If you’ve planted reblooming daylilies… Make sure to remove dead flowers immediately, to encourage the plant to continue flowering. If you don’t follow this step, your daylilies are unlikely to perform as you expect.
Every four to five years… You will need to divide your daylilies as they become overgrown. We’ve provided instructions on dividing, which you can access in last week’s blog.
As always, please do stop by our nursery if you have any questions about caring for your daylilies. As you can see, these steps are not complicated, but following them each season can help you reap far more enjoyment from your plants.
For most gardeners, summer is an exciting time of year. Many of your favorite flowers are blooming, and vegetable crops begin to produce. On the other hand, summer can provide perfect examples of “too much of a good thing”. When heat waves strike, your plants can suffer or even die. These tips will help you protect your garden during this summer’s inevitable heat waves.
Pay attention to your soil. When the top few inches of soil begin to dry and harden, the plants most at risk will be those with shallow roots. However, since any plant can be damaged in a heat wave, follow these tips for the entire garden.
Mulch, mulch, mulch! Mulch is your primary line of defense during a heat wave. It will help your soil retain moisture and reduce the need for watering. Light-colored mulches reflect sunlight and can keep your soil a bit cooler, but you can use any type that is appropriate for your plants’ needs.
Water in the morning. Just like you, your plants can quickly become dehydrated in hot weather. Even with mulching, you will need to water your garden frequently during a heat wave. Do this in the morning to prevent evaporation and heat scald, which can damage leaves. Young seedlings may need a second watering late in the day. Consider using a soaker hose, which delivers water to the ground and spares the leaves from excess moisture.
Consider a shade cloth. You might need to provide shade to more sensitive plants during a heat wave. Shade cloths can serve this purpose, but take care not to reduce aeration. Positioning the cloth on one side of your plants, or straight above them, will suffice.
Take care with transplants. Young plants are most susceptible to extreme heat. You might choose to delay transplanting until the heat wave has subsided. Or, you can proceed with your plans while paying special attention to seedlings. Planting them next to more mature plants can give them the shade they need to survive.
Protect your lawn, too. Don’t cut your grass below three inches during a heat wave, as the height will provide shade for the soil. Avoid fertilizing your lawn during the hottest part of the summer, since the roots won’t be able to adequately absorb their food.
Finally, remember to take care of yourself! Stay out of the sun during the hottest part of the day, wear breathable clothing, and keep yourself hydrated. Healthy gardeners are better able to tend their gardens!

Nothing in the garden says “summer” quite like growing sunflowers. Most gardeners grow sunflowers purely for their cheerful, decorative appeal, but they do have additional purposes. The large, bright blooms will draw pollinators to your garden, which can be important if you also grow vegetable crops. You can also harvest the nutritious seeds, roast them, and enjoy alone or sprinkled on salads.
So, if sunflowers appeal to you, here’s how to get started.
Choose the right spot. Sunflowers prefer 6-8 hours of direct sunlight, and slightly acidic to alkaline soil (pH of 6.0 to 7.5). You should provide them with loose soil and plenty of room to spread their roots, so turn the soil in your bed at a depth of about two feet.
Plant your seeds. If you’ve chosen a larger variety of sunflowers, make sure to space them about 30 inches apart. Plant seeds no more than one inch deep in the spring. If you want, you can sow several seeds together and then thin the plants later. You might also choose to stagger plantings over five to six weeks, so that you’re ensured continuous blooms all summer.
Protect your seeds. Sometimes birds will scratch around in the garden, looking for seeds to eat. If this appears to be a potential problem, cover your beds with a thin netting until seedlings appear.
Feed your sunflowers. Sunflowers are heavy feeders, and prefer soil that is rich in organic matter or composted manure. A light application of fertilizer at planting time can help your flowers develop strong roots. Be careful not to over-fertilize throughout the growing season, as this leads to fragile stems in the fall.
Water your sunflowers. Young plants should be watered around the root zone until well established. Then, infrequent but deep watering is preferred.
Consider support. The taller varieties of sunflower might need support. Bamboo stakes serve this purpose well, or you might consider building a sunflower tower.
Harvest your seeds. If you want to harvest sunflower seeds, take a look at the back of the flower heads. They will turn from yellow to green and finally brown. At this point, you can cut off the heads and remove seeds, or hang them upside-down to dry.
You might be most familiar with the Mammoth variety of sunflowers, which can grow to 8 feet tall. However, many other varieties have been cultivated, and some top out at only 15 inches. Come visit our nursery, and we can help you decide which type of sunflower best suits your space and aesthetic preferences.
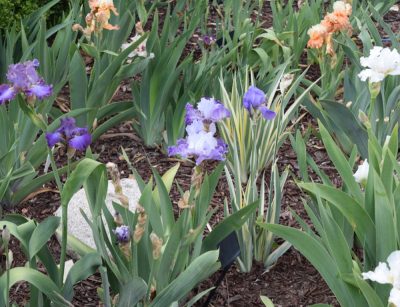
How is your garden looking this summer? At some point, you will notice that some of your flowers slow down or stop blooming. At that point, dividing Irises and Daylilies (as well as other rhizomes), to promote better health and prolific blooming next spring is the ticket!
Perennials that spread through an underground root structure are called rhizomes. Mature plants produce these rhizomes, creating more stems, leaves, and those beautiful blooms you love so much. But then the original rhizome begins to wither and die. That’s why we divide the plants, remove the young rhizomes, and replant them to encourage further growth.
To divide your irises, simply follow these steps:
1. Cut back the leaves (fans) by about half.
2. Dig up the whole clump of rhizomes, and shake off loose soil.
3. Using a sharp knife, cut apart the plant, leaving 1-3 stems per section.
4. Cut back about two-thirds of the leaves. Then, use a sloping cut on the outside of the remaining leaves, to create a fan shape.
5. Replant rhizomes in a hole with a mound in the middle, close to the surface. Place the rhizome on the mound and allow the roots to spread down the sides.
6. Dig these holes in one to three-foot intervals.
7. Water your new plantings, and continue watering a few times per week.
You can divide daylilies in much the same way, using these additional tips:
1. You don’t need to lift the entire plant from the ground.
2. Cut down through the plant to create your sections. Each section should have several stems and leaves.
3. Dig out the sections you want to move, filling in the soil around the original daylily.
4. Replant the new sections at the same ground level, at least one to three feet apart, and water thoroughly.
The above tips can be used for any perennial flower that spreads via rhizomes. This includes cannas, dahlias, bergenia, toad lilies, and lily-of-the-valley. If you aren’t certain of what type perennials you have in your garden or need more help learning to divide them, feel free to stop by our nursery and ask one of our experts for additional tips.
Squeamishness around insects is a normal reaction in most people. So, you’re probably not too pleased to step into your garden and spot creepy crawlies everywhere. But before you dash off to purchase insecticides, do your research to discover whether those insects are even harmful. Some “pests” are actually beneficial to your garden, such as…
Aphid midge. Aphids can be awfully destructive to a garden, but aphid midges will destroy them. They’re attracted to pollen plants, so consider that when designing your garden space.
Ground beetles. These are different from Japanese beetles, which can be destructive to a variety of trees, shrubs, and flowering plants. Common ground beetles will feed on slugs, caterpillars, and cabbage maggots. A groundcover like white clover can provide the perfect home for ground beetles to flourish.
Lacewings. Lacewings will to control aphid, caterpillar, scales, whiteflies, and mealybug populations. Plant sweet alyssum, angelica, or coreopsis to attract them to your garden.
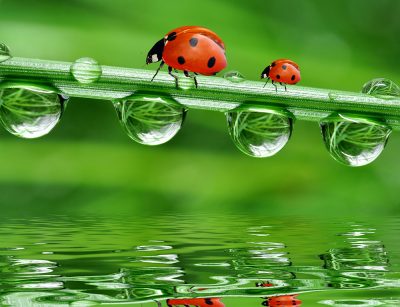
Ladybugs. A population of ladybugs can wipe out aphids, mealybugs, and mites quite effectively. This is especially true if you can get them to stick around and breed, because ladybug larvae are insatiably hungry! You can purchase ladybugs to release in your garden, or plant angelica, dill, fennel, yarrow, or coreopsis to attract them.
Tachinid flies. If caterpillars are a problem in your garden, you want some tachinid flies. Their larvae burrow into caterpillars and destroy them. They’re attracted to dill, clover, parsley, and other herbs.
Spined soldier bug. These look a lot like pesky stink bugs, but their pointed “shoulders” will differentiate them. Since they feed on other harmful insects, it’s okay to leave them alone. Take a picture and decide whether you have soldier bugs or stink bugs.
Damsel bugs. These can be released around vegetable gardens to control aphids, leafhoppers, thrips, and other invasive pests.
If you need help identifying your particular garden pest, come visit us at our nursery. Describe the pest to us, or better yet, bring a photo. We can help you decide how to proceed, whether you want to use an insecticide or a more environmentally-friendly pest control method.
After all of the hard work you’ve invested in your garden, the last thing you want to see is a swarm of invasive pests. Unfortunately, that’s just one part of life, especially for avid gardeners. But with a keen eye for details, you can spot a problem before it inflicts too much damage on your yard. Here are some of the most common summer pests, and how to spot them.
Japanese beetles. You might spot these feeding on your roses, zinnias, and deciduous trees and shrubs. Weekly applications of insecticidal soap or neem oil might be necessary during the worst of an infestation.
Spider mites. These tiny pests hide on the underside of leaves, and you might not even notice them until the leaves turn yellow. So remember to check underneath! Spider mites don’t like being wet, so spraying the underside of leaves with the garden hose can persuade some of them to move away. Insecticidal soaps are also effective on these pests.
Aphids. These little sap suckers will attack leaves, stems, fruits, and flowers of plants, so they can be extremely damaging. If you see curling or yellowed leaves, and you notice a sticky honeydew-like substance on them, you probably have aphids. A variety of “natural” solutions are used by gardeners to control aphids, such as neem oil, soap and water solutions, and diatomaceous earth. Don’t apply diatomaceous earth to blooming plants, though; it’s dangerous to pollinators. Since ladybugs feed on aphids, releasing them into your garden might be a good idea. Garlic, chives, and catnip can also repel aphids when planted in vegetable gardens.
Mosquitoes. These aren’t exactly a garden pest, but we’re including them because mosquitoes can pose a danger to humans. Remember mosquitoes breed around pools of standing water, so empty buckets, baby pools, and other sources of standing water around your home in the heat of summer.
Just a quick note on stinging insects… Many of these are a major pain, literally! It’s understandable that you wouldn’t want hornets or wasps around your house. But do remember the important ecological role that bees play, in pollinating our flowers. So please, do exercise caution as you remove nests of stinging insects.
These are just some of the more common garden pests that we can experience in the summer. For help identifying and treating your particular pest problem, give us a call or come to visit us at our nursery.

For many gardeners, summer is their favorite time of year. Veggies are maturing, and many flowers have reached their peak. But there’s still plenty of work to do, especially as you nurture new annuals in flower beds or manage your vegetable garden. This handy summer checklist can help you get organized.
Fertilize. Now is the time to fertilize warm-season grasses (Bermuda or St Augustine grasses, for example). Late-blooming shrubs, like azaleas, lilacs, and forsythias should be fertilized after they finish blooming. Use a shrub fertilizer as specified on the label.
Remember, too, that potted plants can exhaust the nutrients in their soil more quickly. Fertilize them about every two weeks with a liquid fertilizer, so they will continue to grow vigorously.
Raise your mower blade. Avoid cutting your lawn below two inches, because grass that is a bit taller will require less water. It will also stay green longer between cuttings.
Check on your camellias. Look at the undersides of their leaves, for small brown or white insects called tea scales. These suck sap and damage your plants, but can be prevented by spraying the underside of leaves with a horticultural oil.
Watch out for invasive spider mites. If you see speckled, bronzing, or browned foliage, you might have spider mites. A horticultural oil or insecticidal soap can help with this problem; come to see us and we’ll help you decide which type of product is best for your situation.
Don’t over-water your veggies. If you notice the leaves of your tomato plants turning yellow or curling up, you’re probably watering them too frequently.
Replace spring annuals with summer bloomers. Pansies and violas will begin to die and look unsightly around this time. Replace them with summer-blooming annuals.
Stop pruning. Don’t prune spring-blooming shrubs (azaleas, lilacs, forsythia, and so on) after the first of July. You could cost yourself a large portion of next year’s blooms if you do.
Plan for fall. Summer will be coming to an end before you know it, and don’t want to find yourself feeling envious of a neighbor’s lush fall garden. Plant seeds for fall annuals now; sunflowers, zinnias, and marigolds are excellent choices.
These are just some of the main things to remember this summer. For more advice specific to your situation, come to see us at our nursery. We can help you choose plants, deal with pests, and answer questions related to care for your garden.
Now that the heat of summer has arrived, you might notice that your lush spring blooms have begun to look a little droopy. Many of your spring flowers might be nearing the end of their blooming period, so now it’s time to transition your flower beds to summer. Short of ripping flowerless plants out and starting from scratch, what else can you do?
Plant long-blooming perennials. These will bloom year after year, meaning a lot less work for you. Plus, many of them begin blooming around the time that short lived spring annuals fade.
Pair your plantings appropriately. As spring perennials come to the end of their blooming stage, the yellowing foliage won’t be the most attractive thing in your yard. You can distract from that effect by pairing your plantings, so that as one perennial fades another is blooming to compensate. Pair bulbs according to when they bloom; just watch out for overly invasive species that might take over the garden entirely.
Structure your garden. If you planted only one annual flowering plant in your beds, you would enjoy blooms for only a portion of the year. Instead, arrange your beds with an array of evergreens and colored foliage, and then include pockets of flowers that can be rotated seasonally.
Take advantage of height. Flowering shrubs like hydrangeas, azaleas, or lilacs lend bursts of color to your garden at varying times of the year. As with evergreens, these shrubs add structure and a focal point to your garden, so that you can rotate smaller seasonal flowers in other spots.
Add summer bloomers to edges of beds. Select a few summer-blooming flowers, like marigolds or calendula, and add them to edges of tired-looking beds. These will instantly cheer up your garden without a lot of work.
Include ornamental grasses. Many varieties of ornamental grasses look their best in summer, just as spring blooms fade. Consider these when designing your beds, keeping mature heights in mind.
Use potted plants. In a pinch, simply move a few lovely potted plants into the vacant spaces. You can instantly liven up your beds, without a lot of work.
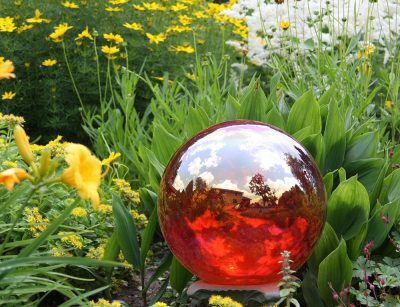
Use garden art. As some spaces begin to look bare, fill them with garden art such as ceramic orbs, figurines, or simple water features.
If your spring flower beds are reaching the end of their peak beauty, come visit our nursery to explore your options. We can help you structure your beds with a variety of plantings so that you can enjoy them year-round.

Perhaps you’ve always dreamed of having your own backyard pool. Whether you want to relax and float in the serene waters, swim laps for exercise, or kick back and watch the kids splash and play, having your own pool can add a lot of enjoyment to your life. But what if your dream home came with a smaller backyard? Does that mean you can’t install a pool? Not necessarily…
In-ground or above ground? Many people prefer in-ground pools, but construction could be a bit difficult in a small yard. That doesn’t mean it’s impossible, especially if you design your pool to fit in with established features rather than having to remove them. On the other hand, installing an above-ground pool can be a bit easier. Then you can build decks or steps around it, making it more attractive. Put a rectangular pool in the back corner of the yard, by the fence, and you only need to build decking around two sides of it (check your HOA codes and city ordinances before installation).
Consider your dimensions. Installing a pool in a small backyard might mean that you’re working with some unusual dimensions. Sometimes these dimensions can actually create a more visually interesting pool that fits better with the overall design of the yard, but they will pose one challenge. Fiberglass pools are only available in certain sizes, so you might need to go with a vinyl liner or concrete in-ground pool.
Freeform pools offer unlimited design freedom. Freeform pools are often popular in small backyards because they are so customizable to the space. Plus, they sometimes allow for more decking space, which might be important if you want a table or a lounge chair by your pool.
What about maintenance? A smaller pool will already be easier to maintain than a large one. However, many other factors will affect your maintenance time and costs. Fiberglass pools are the easiest to maintain, whereas concrete pools require the most work. Vinyl liner pools fall somewhere in the middle, but the liners must be replaced every 8-11 years.
Think about accessories. For the most part, a small pool can include most accessories commonly used in large pools. If you want a tanning ledge, heaters, lights, or slides, you can certainly incorporate those into your design. The difference is that it is better to plan for those ahead of time, rather than to try and add them later.
If you’re considering a small backyard pool, give us a call. We can help you integrate a pool into your existing landscape so that your pool adds not only fun but also beauty to your yard.

An irrigation system is one of the best decisions you can make for your yard. By using this type of system, you can ensure that the right amount of water is delivered straight to your plants’ roots, prevent runoff and waste, and even manage your water bill. Given the lack of consistent rain in California, hand watering (even with an irrigation system) is not a good option for long-term landscape success.
But of course, your results will only be as good as your irrigation controller. You could go with a simple timer, that you set manually, but the newest innovations on the market are smart controllers. These allow for customization, using local weather conditions and forecasts to determine your yard’s water needs. Most are operated from smart phones and/or utilize intelligent technology like Alexa.
The Rachio timer. Not only will the Rachio timer automatically adjust your watering schedule according to local conditions; you can connect with it via your smartphone! You can use the Rachio app to view and control every aspect of your water use, even from a remote location. The wireless flow meter also detects low-flow leaks before they become a serious problem, allowing you time to repair your system. If you need to set up customized zones, delivering more or less water to particular parts of your yard, the Rachio can do that too. Users receive a monthly report about adjustments that are automatically made to watering times based on the heat level at the time.
Hunter Irrigation’s smart timer. If you already have a Hunter irrigation timer, you can convert it to a “smart” timer by adding a Hunter Solar Sync. This is an advanced weather sensor that monitors local weather conditions, and measures solar radiation and temperature, and then adjusts your watering schedule accordingly. Hunter smart timers are EPA WaterSense approved. The Hunter system can also be paired with a flow meter to alert you to serious problems with your system before they become serious problems for your landscape!
If you’re considering a smart irrigation controller, please consult with us. We can help you weigh the benefits of each type of system, as well as install and program it correctly for you. When utilized correctly, these smart timers can promote a healthy, beautiful landscape while allowing you to manage your water usage.
Any new hobby is more fun, and easier to learn when you have the right equipment. That’s why we put together this Garden Supplies 101 list to make the process easier for newcomers (or folks returning to gardening after a break). You might find that you need additional items, according to your needs, but at the very least every gardener needs…
A wide-brimmed hat. This will keep the sun off of your face, protecting your eyes and preventing sunburns (and slowing the signs of aging, if you worry about lines and wrinkles).
Comfortable gloves. Try several brands to obtain a fit that feels right to you, keeping in mind that some fabrics can contribute to hot and sweaty hands if you wear them for very long. These will protect your hands from sunburn, and make cleanup much easier when you’re finished working in the garden. If Roses are an interest of yours, check out the elbow length gloves meant to make cut flowers and pruning safer for you.
Pruners. Choose a set with a comfortable grip, and don’t overlook quality. Sharp, rust-resistant blades will last for years.
A sturdy, but a flexible bucket. You will find more uses for a simple bucket than you can imagine! We recommend the Tubtrug for home garden use. They last for years (and years) and keep you from making too many trips to the green waste can with cuttings.
Trowel and mini rake. You will need these to work the soil and transplant young plants. Choose a set with grips that feel comfortable for you, made of quality materials so that your tools will last. You don’t want such a simple but indispensable tool to break right in the middle of a gardening project.
A harvest basket. You can use a variety of baskets for this purpose, even something that you pick up at a thrift store. Just remember that a sturdy bottom and strong handles are a must. You don’t want the bottom to fall out right in the middle of gathering a bountiful harvest! Higher quality baskets intended for gardening or harvesting often come with a linen liner that has pockets for holding your small tools and gloves.
Clogs or garden shoes. Gardening gets messy, and there is no reason to ruin a perfectly good pair of Nikes. Some simple, waterproof clogs will slip on and off your feet so that you don’t track mud into the house.
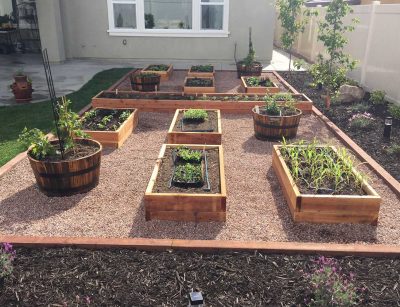
Pots, barrels, or raised garden boxes. Remember, gardening doesn’t have to be done solely in the ground. If your space is limited, plenty of herbs, vegetables, and even small fruit trees can be grown in containers. Maximize your growing potential by placing these on a sunny deck or patio.
Come visit us, and we’ll help you decide which Gardening Supplies 101 items are needed for your gardening project. We can also help you learn about your favorite plants so that you can offer them the best care according to their needs.
One of the biggest trends in the garden world involves growing your own food, for the benefits of freshness and safety. Your efforts can also cut your grocery costs. But of course, with every new undertaking there is a learning curve. You might already know the basics of storing the fruits and vegetables, but what about storing your homegrown herbs? For most, this is brand new territory.
During the growing season, the easiest answer for storing homegrown herbs that are leafy (like basil and rosemary) is to simply leave them in the garden. You can snip off only as many leaves as you need, cutting down on waste. Once the growing season is coming to an end, though, you will want to harvest all of your basil and store it for later use.
If you want to keep fresh cool-weather herbs in the refrigerator, just snip them near the bottom of the stems, and place them in a jar about one-quarter full of water. Covering them loosely with a plastic bag can preserve them a bit longer. Use this method for soft-stemmed, leafy herbs like parsley, cilantro, dill, chives, and mint. Your herbs will last about one week this way, so you will need another method if you are looking for long-term storage.
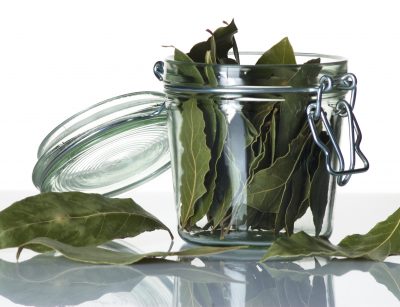
Warm weather herbs with woody, coarse stems (rosemary, thyme, sage, and savory) come from arid/dry climates. You don’t want to dunk these in water. Instead, wrap your cuttings in a paper towel and stash them in a plastic bag. They will last about a week in the refrigerator.
Basil is the exception to both of these rules. If you place it in the refrigerator, it will wilt quickly. Instead, keep your clippings in a jar, with a bit of water in the bottom, in a sunny window. This is a plant that can be grown in a sunny kitchen window in any season if you use it often enough.
As for long-term storage, dehydrating your herbs is the old, tried-and-true method. Unfortunately, they won’t retain quite as much flavor this way. Another option is to freeze the leaves. Some cooks swear by freezing them in ice cubes with olive oil or water, which can then be dropped into soups and stews for instant, fresh-cut flavor.
Finally, infusing your herbs into butters, oils, and vinegars can help you create some unique homemade garnishes for dishes. You might want to research recipes online, or simply experiment to see what you can create. Send us a quick email if you find a great solution or recipe that you’d like to share!
If you’re ready to start a home herb garden, come visit our nursery. We can help you choose the plants that work best for your garden space and cooking needs!
The flexitarian trend has taken over, combining what many believe to be the “best of both worlds” regarding both vegetarian diets and “flexible” (or omnivorous) diets. You’ve probably heard that vegetarians enjoy a myriad of health benefits linked to their plant-based diets, such as a lower risk of various diseases, lower weights, and even better hair and skin. Yet, you might feel reluctant to give up meat entirely.
That’s okay! Eating more fruits and vegetables is always a good idea, even if you never give up animal-based products entirely. You can pursue the “flexitarian” trend, by including more plant-based foods in your diet, while still enjoying the occasional burger or steak when the mood strikes you.
Of course, as with any primarily plant-based diet, protein is the big concern. You will need to pay a bit more attention to your protein consumption, and make a special effort to consume enough of this important nutrient. Flexitarians even coined a term for their favorite protein sources, called “new meat”, and it refers to plant proteins such as tofu, beans, lentils, peas, nuts, and seeds.
So, if you’re sold on the idea of including more plant-based foods in your diet, you might also be wondering how you can include them in your garden. Obviously, everything you’re already growing in your backyard garden, such as tomatoes, greens, or herbs, is an acceptable part of a flexitarian diet. But what about those protein sources?
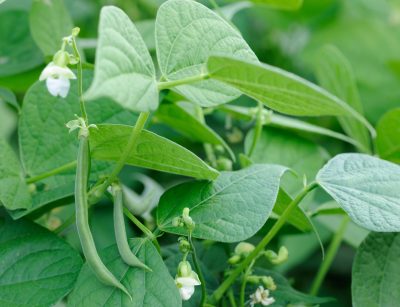
Beans and peas are probably the easiest crop for home gardeners interested in more protein-based plants. They will grow best in a sunny spot, and we certainly have plenty of sun here in Southern California! Make sure that your soil is well-drained, because sogginess can kill young plants as they germinate. For this reason, raised beds often work best for peas and beans.
Prepare your soil by working composted manure into the top few inches, and add an organic fertilizer high in phosphorous and potassium. Peas prefer cool soil, so you can plant them in the spring, whereas you should wait until the soil reaches 60 degrees before planting your beans. Peas can be planted close together, about one inch apart in rows. Space bush about four to six inches from one another.
Many varieties of beans and peas prefer to climb poles or fences, so provide the appropriate support for the varieties you’ve chosen. If you come visit our nursery, we can help you choose the right plants for your needs, and offer further advice on planting and maintenance.
As you know, peas and beans can be substituted in many recipes where you might otherwise use meat. Try your new harvest in burritos, enchiladas, salads, soups, and more. They’re so versatile that you can use them in almost anything!

If you’re considering the addition of a garden feature that will add both visual interest and a soothing appeal, you might be interested in the trend of “tunnels” created by shaping trees or other plants. Not only will your garden be the talk of the town; you can provide yourself with a soothing meditative space in your own backyard.
Wisteria tunnel. Wisteria spreads prolifically, and produces fragrant, bright-purple blooms in the spring. While Japanese horticulturalists have been training the woody vines to grow on trellises for years, the trend is becoming popular in the US as well. The most difficult part of this project is building the tunnel, or trellis. Keep in mind the space offered within your backyard (and check with your homeowner’s association, just in case, to be sure that the tunnel won’t count as an additional “structure”).
As your wisteria grows, keep the stems attached to the trellis posts with heavy-duty garden twine until it is well-attached to the structure. Wisteria will usually bloom within three to five years of planting, but keep in mind that some varieties are much slower. Proper planting and pruning can help your wisteria to bloom more quickly. This is definitely a long-term project for the dedicated gardener, but the results are well worth the effort.
Tree archways. By planting two rows of trees and then encouraging them to “arch” toward one another, you can achieve a tunnel-like effect. Like the wisteria tunnel, a tree archway is clearly a long-term project requiring many years of careful planning.
Select a species of tree that grows tall and narrow, and is tolerant of pruning. Examples would be yew, privet, magnolia, bottlebrush, or podocarpus. Some varieties of fruit trees can also be trained to grow in an arch formation. Remember to plant your trees the appropriate distance apart from one another (usually about four to six feet apart), and insert a metal “T” stake at the side of the tree facing into the intended archway.
You will loosely tie the tree to the stake with twine, and in late winter prune away branches that deviate from the arch. Each spring, gently bend new growth toward the center of the arch and tie the stems together. Eventually the trees will be trained into this formation, and you can remove the metal support stakes.
Keep in mind that these projects do require specialized pruning and care over the years, and that you will likely need more guidance than we can provide in a single blog. Keep in touch with us, and we will be happy to continue helping you create the garden projects of your dreams.

Are you looking for a unique outing that will please the entire family? Southern California boasts an impressive number of botanical gardens, vineyards, and farms, sure to please just about anyone. These 8 Southern California Visits are by no means an exhaustive list, but should provide you with some fun ideas for day trips around the Temecula area.
Myrtle Creek Botanical Gardens. This popular destination, located in Fallbrook, offers quiet reflective gardens, plants for sale, an on-site store, and even catered lunches. The kids will enjoy feeding the goats, and adults might appreciate the nearby vineyards and wine tastings. Their newly expanded fairy garden workshop is sure to please adults and kids alike.
Alta Vista Gardens. Located in Vista, the mission of Alta Vista Gardens is to “bring together people, nature, and art”. The botanical gardens are punctuated with works of art, and classes are offered on an ongoing basis. Fish and turtles will delight young children, and everyone will enjoy the serene atmosphere. Pack a picnic and plan to stay for a while!
Rose Haven Heritage Garden. Located in Temecula, the Rose Haven Heritage Garden serves as a showcase for a number of rose varieties. Meander the quiet garden paths, and breathe in the aroma of rose blooms. Check their schedule for children’s programs before you go. Be sure to check out the Tree of Life edible garden that McCabe’s installed years ago!
Finch Frolic Garden Permaculture. Head down to Fallbrook to tour this two-acre space that has been lushly planted with a variety of food crops. Learn all about permaculture, and how to promote a sustainable, self-sufficient ecosystem in your own backyard.
Kenny’s Strawberry Farm. Also located in Fallbrook, this pick-your-own strawberry farm makes a great educational experience for kids and adults alike. Fill a basket with strawberries fresh from the field, guaranteed to be the best you’ve ever tasted!
Niguel Botanical Preserve. Tucked away in Laguna Niguel is an 18-acre nature preserve packed with plants from all over the world. Plan to spend several hours walking the trails, enjoying exotic species of flora.
Lavender Hill Pumpkins. Head back to Fallbrook in autumn, and visit this unique pumpkin patch. Lavender Hill specializes in a variety of pumpkins and gourds in all shapes, sizes, and colors. Grab a few for jack-o-lantern carving, stock up to make your own pies, soups, and breads, or simply grab a variety of different specimens to decorate your front porch.
Wrigley Botanical Gardens. If you’re up for a ferry ride, head over to Santa Catalina Island. There’s plenty to do, including the Wrigley Botanical Gardens, which many have said to be a unique experience due to the variety of indigenous plants. The gardens also serve as the gateway to the popular Garden to Sky trail, which boasts an impressive view.
Of course, we’re always happy to visit with you at our nursery. Stop by anytime, and we can offer expert growing advice and help you choose plants to create your own backyard escape.
Growing your own food at home offers wonderful benefits. You save money at the grocery store and the produce is so much fresher (and more delicious). If eating organic or making home remedies is important to you, the only true way to ensure your plants are “clean” is to grow it yourself!
Of course, tending a large garden can be time-consuming, and you might not be interested in such a complicated hobby. Yet, the idea of growing a few edible plants still appeals to you… So, if you can only grow a few plants, the question becomes which are the most beneficial to grow at home?
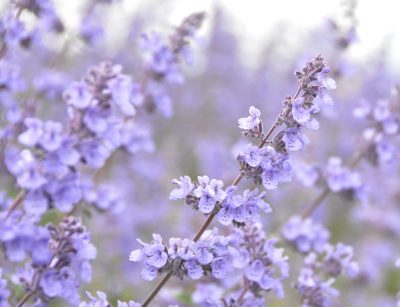
Rosemary. This herb is easy to grow, versatile, and won’t require a lot of room. Just one rosemary bush will save you money each time you would otherwise purchase a four-dollar sprig of the herb at the grocery store. The flowers are a lovely shade of blue and the scented foliage helps to repel unwanted critters from your garden. If rosemary doesn’t appeal to you, choose your favorite and most-used herb (perhaps basil) and grow that one instead.
Lemon tree. Almost anyone can grow a small lemon tree, either in their yard or simply in a large pot on the patio. The fruits are long-lasting and can be used for a variety of purposes (seasoning chicken or fish, as an ingredient in salad dressings, as a flavoring in tea or other beverages, and so on). Both Meyer Lemon and ‘traditional lemons’ make excellent garden additions.
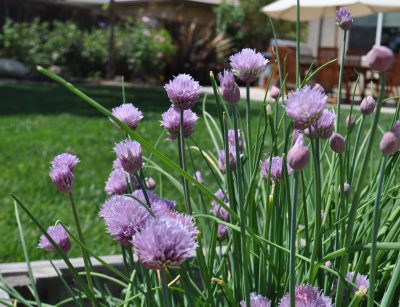
Chives. Chives are just ridiculously easy to grow, and they’re pretty, too! The purple-pink flowers are as edible as the plants’ leaves. Any time you need chives for a salad, baked potato, or another dish, simply snip off the amount that you need. This perennial herb will last for years to come and is available for eating year-round.
Aloe. Aloe plants grow easily in pots, both indoors and out. It also just happens to be one of the best and easiest home remedies for minor burns and other injuries; just snip off a bit of the plant, and apply the “juice” to your wound. For this reason, Aloe is one of the most beneficial plants to keep around. It is a very low water and maintenance garden addition.
The above plants are all easy to grow, and can be used for a variety of purposes. But if they don’t appeal to you, choose a few of your favorite and most often-used herbs or medicinal plants. It’s more important to grow something you will actually use! Then, come visit our nursery, and we’ll help you decide which plants will grow well, considering the amount of room and time you can spare.
We’re all surrounded by mass-produced products, to the extent that we often forget that people still make things by hand! But we believe that in gardening, handcrafted is often the best choice, for the following reasons:
Handcrafted items are unique. You want your garden to stand out, add curb appeal to your home, and gradually evolve as your own showpiece. So why use elements that will be repeated all over town in nearly-identical yards? Handcrafted items will lend that special, one-of-a-kind touch, to make your project truly special.
Handcrafted means quality. With handcrafted items, you can talk directly to the artist, learn about the materials they use, and receive tips on caring for your new addition. This often is not the case with mass-produced products from big-box stores.
Support your local economy. When you buy handcrafted items from a nearby artisan, your money stays in your local economy. Your money doesn’t support a wealthy businessman who owns factories overseas; it now pays for dance lessons, new shoes, or school tuition for the children of a self-employed member of your community.
Add more diversity to your décor. You can find handcrafted items for just about any application in the garden, but we suggest looking for the following:
• Handmade wooden swings or rocking chairs
• Planting containers from a nearby potter
• Arbors and trellises from local woodworkers
• Lawn ornaments from independent artists
• Water features, custom designed and installed to suit your yard
• Fire pits or outdoor fireplaces, built by a local craftsman
These ideas are just the tip of the iceburg. Familiarize yourself with nearby flea markets, artists guilds, and craft fairs, and frequent them regularly. When shopping for new items for your garden, remember to check local newspapers, Craigslist, or Facebook groups for one-of-a-kind items. And, if you’re feeling extra ambitious, perhaps enroll in a workshop or teach yourself how to make your own handcrafted products. Begin to substitute unique, artisan items for mass-produced ones, and your garden will take on a personality of its own.
Backyard gardens once fell out of fashion toward the middle of last century, probably due to the mass availability of supermarket fare. However, home-grown fruits and veggies are now enjoying a much-deserved resurgence in popularity. Amateur gardeners have discovered that food grown in their own backyards tastes fresher. It is also more affordable than supermarket versions that have spent the previous week traveling across country, packed in the back of a truck. Growing Heirloom fruits and vegetables is not only fun, but also offers the opportunity to find produce uncommon in grocery stores today.
If eating organic matters to you, you can be sure of exactly which pest control methods and soil additives have been used in your own garden. Many gardeners started growing their own food as a commitment to their health, but now their part-time hobby has grown into a passion for food.
Part of that passion might derive from the greater diversity of food that you can enjoy with a backyard garden. Whereas we were once limited to whatever produce happened to arrive at our nearest grocery stores, we can now cultivate rare or heirloom varieties of fruits and vegetables that were once nearly forgotten. These fruits and vegetables lend a unique touch to meals, with their unusual flavors and interesting textures, making each meal feel gourmet.
In particular, tomato enthusiasts should investigate the immense variety of heirloom strains that are available. Tomatoes vary so much in flavor, and many varieties can be so much more rich and complex than your typical grocery store versions. They even look more interesting and artistic!
Heirloom pumpkins and squashes are other crops that have grown in popularity. Many varieties of winter squash can be harvested in the fall and kept sitting around your home as decorations until you’re ready to use them… And they only get sweeter and more flavorful as they ripen slowly over months! Tomatoes and squash are just two examples, of course. For any fruit or vegetable that you can imagine, there is likely to be a wide array of heirloom and unusual varieties just waiting to be discovered.
How do you gain access to this new world of diverse food options? It’s simple… You can join a community garden or local seed swap, and exchange heirloom seeds and growing tips with other fellow gardeners. You can even search for seed companies online, and order anything you can imagine. Isn’t it amazing, how the Internet has allowed us to come full circle and bring back “old” ways of doing things?!
We can offer tips on setting up your backyard garden, so you can enjoy many years of fresh produce just beyond your doorstep.

For nature enthusiasts, a visit from hummingbirds can feel like a special occasion. They will prefer your yard, and be more likely to visit on a regular basis if you provide them with an abundance of their favorite food in a hummingbird garden. Of course, water, nesting sites, and perches are important too. They tend to prefer areas that offer a mix of tall trees and shrubs (likely as a means of protection) along with the foods they enjoy, so keep that in mind.
Location:
Choose a spot near a large window or porch. You want to observe your little visitors, so plant your hummingbird garden near a good vantage point.
Use what you have. If you already have a trellis or window box, these make the perfect spot to start your garden.
Water:
Provide water. Somewhere near your hummingbird garden, offer your visitors a drink of water. You can use a fountain, birdbath, or even just a large, shallow dish recessed into the ground. They do tend to prefer moving water if you can provide it.
Plant Choice:
Choose plants that attract hummingbirds. This might seem obvious, but it’s the most important part of planning a hummingbird garden. Since you aren’t trying to import hummingbirds from foreign countries, you want to plant the foods that our native hummingbirds prefer. Many varieties of flowers have been cultivated for their size, color, scent, and shape, but don’t actually produce the abundance of nectar that will attract hummingbirds.
Native plants are best, and hummingbirds tend to prefer red blooms. Orange and pink are also acceptable, but the birds will often ignore white or yellow flowers. Tubular-shaped blooms are often preferred. Remember that a large quantity of nectar is most important. We suggest: Petunias, Lilies, Red-hot pokers, Sage, Verbena, Summer Phlox, Daylilies, Coral bells, Foxglove, Lupine, Butterfly bushes, Impatiens, and Pincushion flower, among others.
Come visit our nursery, and we’ll help you decide which types of flowers work best for your garden space while providing the blooms and nectar that hummingbirds prefer.
Nothing quite says farm to table like a fresh, delicious salad right from your own garden! The taste of supermarket salads just can’t compare, because the produce at your local store has often been packed, shipped, and stored for a week or more after it was picked. Once you’ve enjoyed a salad made with tomatoes still warm from the sun, there’s just no going back. Of course, we don’t all have time or garden space to grow multiple vegetables. But nearly everyone can manage a caprese salad garden, even if you only have a small patio. Tomatoes and basil can be grown in pots, so all you need is a small, sunny spot on a balcony or in your yard.
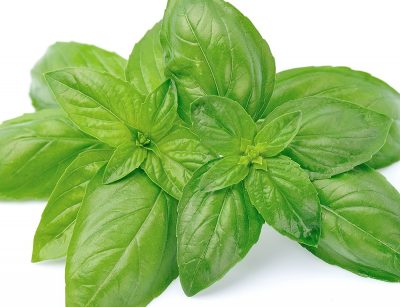
Sweet basil
You can choose any variety of basil, but most people agree that sweet basil goes best in a caprese salad. Grow your plants from seed, or purchase a few starter plants from a garden center. Just remember to thin the plants if multiple sprouts cluster together. You can harvest your basil in about 40 days, by pinching off the top of plants or cutting stems. The plants will continue to grow back until the first hard frost starts to kill them off.
Tomatoes
You can grow any type of tomato you prefer, but smaller ones like cherry or Roma tomatoes work best in pots or hanging planters. There’s definitely nothing stopping you from growing larger varieties in a big pot, though. Come visit our nursery to explore different varieties, and we’ll help you decide which one will work best in your garden. Some types of tomato can be ready for harvest in as little as 55 days.
Plant them together, if you can. If you have garden space in your yard, or you’re using oversized pots, grow tomato and basil together in the same soil. Tomatoes and basil are “companion plants”. Due to the way they interact with nutrients in the soil, the tomatoes actually taste better when grown alongside the herb! The strong scent and taste of basil act as natural pest repellents.
Add mozzarella cheese and dressing. Slice your tomatoes and mozzarella, arrange on a plate with your basil leaves, and drizzle with a delicious balsamic vinaigrette. You can purchase this dressing pre-made, but it’s simple to make your own.
Just whisk these ingredients together:
• 3 tablespoons balsamic vinegar
• 1 tablespoon Dijon mustard
• 1 minced clove of garlic
• ½ cup olive oil
• Salt and freshly ground pepper, to taste
That’s all there is to it! Get started on your caprese salad garden as soon as the first frost has passed, and in about two months you’ll be enjoying the freshest summer treat you’ve ever tasted.
Just as in any other industry, the landscape design world sees its share of trends that come and go. Lately a fun trend that we’ve noticed is something called the “bedhead garden”. Could it be a fun project for you?
You might recall seeing pictures of women who post their “bedhead” on social media. “I woke up like this!” they proclaim. Their hair is messy – perfectly messy, almost as if they did it on purpose. That’s the basic idea behind bedhead gardens; they’re casual, messy, and yet somehow, visually appealing. The bedhead garden is a bit overgrown and even “sloppy”… and it’s perfectly, imperfectly pretty.
This trend might appeal to you, if you’re tired of tidy, overly styled gardens. The row of neatly trimmed hedges, the one accent tree, the flowers that match the trim on the house… It’s all just too fussy and a bit boring for you. Maybe you see yourself as more of a free spirit, or you enjoy letting nature take its course. You might prefer for your home to look lived-in, and you’re not the type to always match your shoes to your purse. A bedhead garden is the perfect mix of a little bit planned, and a little bit wild.
Advantages of bedhead garden. If you want to be out in the garden every day, pruning your plants to perfection, a bedhead garden is not for you. But it should definitely appeal to those of you who want to plant a few of your favorite selections, and then enjoy whatever they decide to do.
This does not mean your garden will never need maintenance. You will certainly need to provide water, for example, as according to your plants’ needs. But the basic premise is that you provide your plants with the sunlight, water, and fertilizer that they need, and yet you don’t micromanage them into neat rows or tidy shapes.
Bedhead gardens can also include unique, upcycled items (check our last blog for this topic). So, this style encompasses an environmentally-friendly aspect, and can be easier on the wallet.
Are there any drawbacks to bedhead gardens? Not really. You can always go back to a more manicured style if your tastes change in the future. The only real drawback might be your Homeowner’s Association. If the rules are strict, your HOA might complain. Do check with your neighborhood’s by-laws before making changes to your home’s exterior.
Of course, there are some plants that really do require a lot of attention, pruning, and so on. Those might not be ideal for a bedhead garden. Come visit us at our nursery, and we can help you select some lush plants that prefer to be left alone to grow freely.
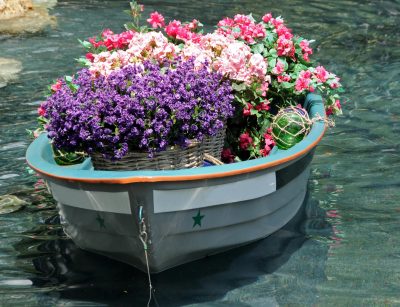
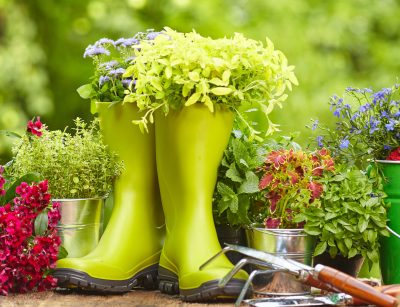
When you think of planters, you probably picture the ones you can purchase from any home goods or garden supply store. But you can also make your own planters from “upcycled” items that you already have around the house, or that you pick up at thrift stores and garage sales.
Utilizing upcycled planters serves a variety of purposes. Obviously, you now have a planter to grow the flowers, herbs, or ferns of your choice. You’ve saved some money (sometimes a considerable amount of money, because planters can be expensive). Your garden features unique, one-of-a-kind items and has a vintage flair. And, of course, you’re re-purposing used items so that they don’t end up at the local dump. It’s a win-win-win-win situation!
So, what type of items can you use as upcycled planters? Really, anything that will hold soil can be used! Here are some ideas to get you started:
• old wine bottles or other glass bottles
• milk jugs for hanging plants
• used paint cans
• old boots
• antique wheelbarrows
• worn-out kitchen items like old pots or food containers
• used tires (paint them funky colors for a boho look)
• your kids’ discarded toys
• hanging shoe racks
• used light bulbs
• discarded furniture drawers
Your imagination is the limit!
Just remember one thing: Plants have their own needs, and some will quickly outgrow a smaller planter. So, match your planters and plants with that idea in mind. Don’t crowd them too much, or they usually won’t thrive.
And, of course, place your planters in the appropriate places on your porch or in the yard. Some plants prefer a shady environment, while others need full sun to survive.
Once you’ve chose some unique upcycled planters, come visit our nursery. We can help you select plants that grow well in containers, and review their basic water and sun needs with you.