
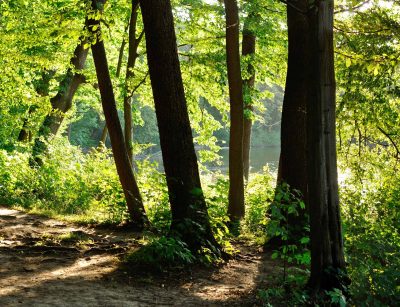
You might be hard-pressed to find someone who isn’t stressed out in 2020. We’re all feeling anxious about everything that is happening this year. The good news is that years of research into stress, anxiety, and depression have produced some promising findings that hold potential to help us through this challenging year. And one thing that many of us have already discovered is that spending time outdoors can change our perspectives, soothe stress, and help us feel more centered and relaxed.
Even just a few minutes of outdoor time can work wonders for your mood. Of course, if you’re convincing a family to go along, you need ideas more compelling than simply sitting in the backyard. Try these outdoor activities to get your family motivated to spend more time outside.
- Take a hike
- Find a hidden swimming hole
- Go for a scenic drive
- Take off your shoes and feel the grass under your feet
- Pack a picnic
- Hold a dance party in the backyard (respecting limits on gatherings, of course)
- Meditate outdoors (with or without music or guided meditation)
- Practice yoga
- Try Tai Chi
- Start a photography hobby (photographing flowers or mushrooms can be oddly satisfying)
- Enjoy a change of pace while reading or studying
- Go camping
- Cook a meal together (on the grill or a simple campfire)
- Plant a garden
- Walk a pet
- Gather and identify leaves or wildflowers
- Swing (the action of swinging is soothing, too)
- Go for a bike ride
- Fly a kite
- Watch the sunset or sunrise
- Look for stars and identify constellations
- Start a list of National Parks and sights you want to see, and plan your first trip now
These are just some ideas, but you can probably think of even more. Try to get outdoors at least once every day, even if you just perform a mundane, routine task. Vitamin D is good for your immune system, and the fresh air and sunlight will boost your mood. Give us a call if you have thoughts about renovating your outdoor space, and we can help you make it even more inviting.

If you’ve heard the term “jungalow” and you’re wondering what that’s all about, you’ve come to the right place. Jungalow is still a hot home decor and garden trend, and we’re here to fill you in.
As you might have deduced, the word “Jungalow” is a combination of “jungle” and “bungalow”. It was coined by designer Justina Blakeney to describe her own eclectic blend of vintage and new, unique personal touches, folkish style, and abundant houseplants.
Those who bring the Jungalow style to their home don’t just place houseplants everywhere but dedicate themselves to rediscovering colors, textures, and patterns – particularly those of a more tropical style. The idea is to bring nature indoors but to mix it with both classic pieces and those reminiscent of your own personality and experiences. The result is a little bit colorful bohemian, a little bit 1950s kitsch, and a whole lot of life.
To accomplish Jungalow style, keep your eyes peeled for interesting new and vintage finds, such as:
Textures like wicker, wood, and rattan
Wallpapers in interesting patterns
Motifs such as tropical leaves and flowers
Furniture and decor with a relaxed, comfortable vibe
Unique pieces, especially those that reflect your travels
Anything leafy and green
Plants, of course – anything from ferns to a lemon tree to an air garden
Junglaw style might be eclectic, but that doesn’t mean cluttered. Focus on a few key pieces with clean lines and simple colors, then mix in more vibrant details. Windows should be free of obstruction, to let in the light, which you will need for numerous lush houseplants.
And finally, keep in mind that those plants should be potted in interesting containers and placed strategically around the room. Keep in mind the light and care requirements for each plant; some will do better hanging in a window, whereas others can be placed just about anywhere. Most of all, have fun. Jungalow isn’t about sticking to a particular design for years. Add new touches when you find them, and let your home continually evolve to match your personality.

If you’re like a lot of us, you’re embarking on another semester of distance learning. School-from-home is a bit different from homeschooling because public and private school students need to be “plugged in” for a significant portion of the day. It’s no wonder some of you are looking for solutions to keep your children engaged and active! These ideas can help you get outside more, to re-center yourselves, and make the days more enjoyable.
PE in the yard.
Many traditional classes translate to a distance learning format pretty easily, but Physical Education often doesn’t work so well on the computer. Get boisterous kids outside, turn on some music, and set them loose dancing or jumping on the trampoline. A YouTube Zumba class for kids can be a great way to pass the time, or you might prefer something more relaxing like yoga. Set up an obstacle course, play a game of outdoor Twister, draw hopscotch patterns on the sidewalk, or get the whole family involved in a game of tag football. You’re only limited by your imagination!
Outdoor lessons.
We all know that some lessons are better learned when they’re “hands-on”. Worksheets on the life cycle of plants are one thing; seeing them in action in the garden is quite another! Ask the kids to help in the garden and they’ll learn, firsthand, how plants grow and reproduce.
Quiet reading time.
Outdoor time doesn’t always have to be active. If your child has assigned readings to complete, why not do those outdoors? You can all soak up more vitamin D and get some fresh air, helping you to stay healthy both physically and mentally.
Get crafty.
You didn’t really want to spend the next six months vacuuming glitter out of the carpet, anyway. Move craft time to the great outdoors, and you can save yourself plenty of headaches dealing with the messes!
Scavenger hunt.
Instead of simply listing items for the kids to find outdoors, make them a list of clues to decipher. It will engage their brains, keep them busier for longer, and is simply more fun.
Cooking class.
We all know cooking is a great way to teach kids math, along with general life skills. But when you’re outdoors, you can learn a host of new lessons. If your kids are old enough, start teaching them how to grill along with fire safety lessons. If you have a pizza oven, everyone can choose toppings for their own mini pizza.
What if your backyard leaves a lot to be desired? Give us a call, and we can help you renovate your space. Even just a few simple changes can help you enjoy the outdoors more, and make the space fresh and exciting for kids.

We all grieve in our own ways, but many of us find that creating something beautiful during a time of grief can be soothing. Since a tree will provide beauty and a soothing presence for many years to come, some people find memorial trees to be the perfect way to remember a lost loved one.
Choose the right tree, for the right spot.
As with any other time you plant a tree, choosing the right tree and the correct placement in your yard is essential. Avoid planting a large or fast-growing tree near a driveway, sidewalk, power line, or the foundation of your home. The last thing you want is to face the removal of your special tree due to poor placement.
As for the tree itself, consider whether it is well suited to our local climate. A disease- and pest-resistant variety will mean easier care throughout the years. You might wish to choose a species that reminds you of the person you are honoring or one that symbolizes something important to you. Consider their favorite colors or season, or simply select a tree that reminds you of their personality.
Fertilize and water your tree.
Young seedlings can be more delicate, so plan to fertilize and water your tree according to its needs. After a few years, the tree’s root system should be well established. It will still need water during times of drought, occasional fertilizer, and regular pruning to stay healthy.
Consider seating.
If you’ve chosen a shade tree, adding a bench or swing can be a nice touch. You will be able to sit and enjoy the special spot you’ve created for many years in the future.
Add a plaque.
A memorial plaque can be as simple or as elaborate as you wish. Include your loved one’s name, a favorite quote, or any other information that you would like to share about them.
Landscape around your memorial tree.
Your memorial tree can even become an ongoing project that provides an important focal point in your yard. Consider adding a stone pathway leading to your tree, a small flower garden nearby, or other features that help the tree to stand out.
If you need help choosing a new tree for your yard, give us a call. We can help you decide how to add a lovely symbol of remembrance to your lawn.

As summer begins to wind down, most of us are ready for some cooler weather. But is your yard ready too? Here are some tasks to consider as the seasons begin to change over to autumn.
Clean up. Leftover debris from spent plants is unattractive, and can also attract pests and diseases to your yard. Remove annuals that are no longer producing, deadhead flowering plants, and clean up dying vines.
Trim trees and shrubs. When the growing season is over, it’s time to trim trees and shrubs. Use caution with sharp tools and when climbing on ladders.
Fertilize the lawn. As the grass goes dormant, it’s time for another round of fertilizer. This will ensure healthier, more lush growth next season.
Reseed the lawn if necessary. If you’re noticing unattractive bare or thinning spots in your lawn, reseeding might be in order.
First, check the pH of your soil, and make any necessary adjustments. For best results, a pH between 6 and 7.5 is recommended. Add lime to the soil that falls below 6, or sulfur if your pH test comes back above 7.5.
Reseed your lawn after adjusting the pH for the best results.
Replace summer annuals. If summer annuals have died, leaving you with bare spots in the garden, it’s time to replace them. Choose flowers or other ornamental plants that thrive in autumn, making sure to fertilize appropriately.
Plant bulbs for next spring. If you want to enjoy spring flowers that grow from a bulb, such as lilies or tulips, autumn is the time to make those plans.
Call us if you need help. If you have questions about any part of your landscape design, give us a call. We can help you make the right decisions about your lawn, ornamental trees, flower beds, and more, to help your home look its best.

More and more families are joining the homeschooling movement, and many of them report learning the same lesson early in their adventure: You don’t need to mimic “school” in order to learn! In fact, many families find that avoiding a classroom approach, and learning in a more natural setting, is beneficial to their children.
By “natural”, we mean that literally! Time in nature is not only good for both kids and parents; educational opportunities abound in the great outdoors.
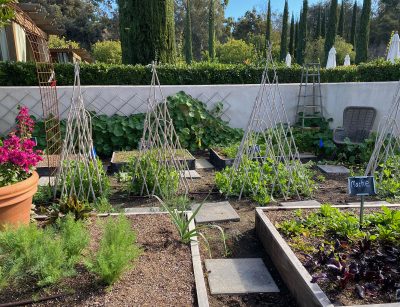
Plant a garden.
Not everyone has the time, space, or funds for a full-on backyard farming endeavor. No worries. Planting just one or two plants will provide a terrific science lesson for youngsters. Learn how food is produced by observing a tomato, bean, or squash plant. All of these options are easy enough for novice gardeners.
Take a hike.
Hiking is great exercise, but you can learn a lot about ecosystems too. Take along a field identification guide for plants, mushrooms, or animals, and see how many you can identify.
Hunt for medicinal plants.
Kids are often amazed to learn that many plants and mushrooms provide medicinal benefits. Gather your chosen species only where it’s legal, and take them home to learn about preparing teas, tinctures, and more.
Do be certain of what you’re picking, if you plan to use it internally, and exercise special caution with mushrooms.
Draw inspiration from nature.
Art “class” can be conducted outdoors, too. Take along a notebook, and experiment with drawing flowers, mushrooms, landscapes, and more.
Conduct outdoor science experiments.
Build a “parachute” and use it to drop eggs off the porch. Blast off your own “space rocket” or craft paper airplanes. Build a water wheel or start an ant farm. The ideas are endless! As a bonus, doing messy science projects outdoors means less mess at the kitchen table.
Visit nearby botanical gardens.
Not only can you learn plenty about plants, but if you take along your reading or math assignments you can spend the entire day learning in a relaxing environment.

Lately, we’ve witnessed a dramatic increase in the number of people interested in food-bearing plants. Specifically, you might be wondering if you should utilize permaculture in your yard, adding plants that produce food within a sustainable system. That decision, of course, is ultimately up to you. But some basic information might help you decide how to proceed.
What is permaculture?
There is quite a bit to learn about permaculture, but in layman’s terms, you could consider it a way of designing your landscape in harmony with nature rather than working against it. If your goal is food production, you want to choose plants that thrive in the spots you choose, require little maintenance, and reproduce year after year.
Permaculture is based on a whole system’s point of view. So instead of simply planting a traditional row garden year after year, you design the landscape to be self-supporting and self-sustaining.
Fruit trees, berry bushes, and more.
Start by considering fruit trees and berry bushes that, once established, require minimal care and produce fruit each year. You still need to plant them in the right environment, of course, but you do this by choosing the right plant for your yard. More research is required upfront, to select a variety that works with your climate and landscape, but the tradeoff is less work in the future.
Add perennial edibles.
Some edible plants return year after year, so you don’t always need to rely on row gardening to produce food. Try planting rhubarb, asparagus, chives, watercress, sorrel, artichokes, garlic, radicchio, and kale all fit into this category.
The key is to introduce these plants to areas of the yard best suited for their needs, rather than the old approach of altering your yard to suit the plants. A plant that requires more shade should be grown on a shady side of your house, or next to a taller plant.
Take advantage of companion planting.
Some plants benefit from one another, and both will thrive when grown together. For example, garlic repels many of the common pests that plague apple trees. Taking advantage of companion plants can reduce the amount of work you need to do in the garden.
Consider edible or medicinal herbs and “weeds”.
A weed is simply a plant growing where you don’t want it. However, many of the things we tend to consider “weeds” are actually edible or medicinal plants! Purslane, shepherd’s purse, dandelion, thistles, and many other common weeds can be utilized in a variety of ways. Once you view these plants from the perspective of their benefits, you might wonder why we often fight so hard to eradicate them from our lawns.
With permaculture, you can set aside the idea of a typical, grassy lawn (and all the maintenance it requires). Or, you can enjoy that look in your front yard, while setting aside an area in the backyard to permaculture more naturally. An “herb bed” is a good place to start. Many herbs will propagate freely on their own when introduced to the right area of your yard.
If you’re considering a new, more sustainable landscape for your yard, give us a call. We can help you decide which plants will thrive in this type of system and where they should be placed for maximum benefit.
You might have noticed what appear to be sails, mounted at angles over patios, play spaces, and more. Not only are shade sails an attractive way to block harsh sunlight during portions of the day; they can be much more “time friendly” compared to many other home improvement projects. Rather than a costly and time-consuming construction project, you can simply mount a shade sail in about a day. If you have any other questions, read on…
What are shade sails made from?
Most varieties of shade sail are made from a high-density knitted polyethylene fabric, which offers both shade and UV protection from the sun. You can purchase shade sails in rectangular or triangular shapes, of just about any color. If made from a waterproofed material, shade sails can also block the rain.
Where do you use shade sails?
In short, you use a shade sail anywhere that you want shade, and that a shade sail makes more sense than something else. For example, if you want to shade a patio but can’t or don’t want to build an addition to your home, a shade sail makes a good solution. Or, you might wish to shade a play area or some other structure in the yard.
A shade sail is the perfect solution when you want to shade an area, but not permanently. For example, you might wish to block sun from a porch or patio in summer, but then remove the shade sail in the winter to allow light to warm the area. It is also an ideal solution for spaces where building codes and setbacks don’t allow for the addition of a patio cover or permanent structure.
How long does a shade sail last?
A well-made shade sail will last from five to ten years, depending of course on how it is used. Weather patterns also make a big difference, with heavy winds and rain damaging the fabric more quickly. Many manufacturers do issue a ten-year warranty, but that just covers UV degradation of the fabric.
Can you put a shade sail anywhere? Is it easy?
Theoretically, you can install a shade sail anywhere that you want to block sunlight. Of course, this is assuming your HOA has no objections.
Also, while they are simpler than a construction project, keep in mind that mounting a shade sail is a bit more tricky than it might appear. It is important to use the right type of steel post, placed at appropriate angles to offer correct support. You can also attach one side of your shade sail to your home, or even to a tree of appropriate diameter. Always choose appropriate support for your shade sail, or it will tend to sag over time.
If you have any other questions about shade sails, give us a call. We can guide you through your options as you continue to improve your home and landscape.
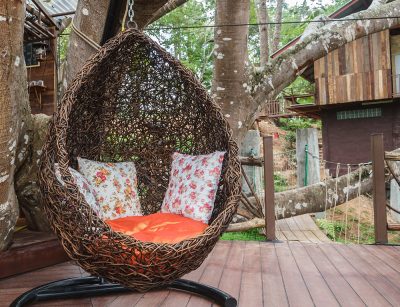
As you’re setting up an outdoor seating area, you will face a number of options. Outdoor seating can provide a place for conversation, eating, reading, working from home, or just soaking up some sunshine instead of feeling cooped up indoors.
Lately, basket seats are all the rage, featured in social media ads and on websites like Pinterest. If you’ve considered one of these cozy hanging seats for your own home, here’s what you need to know.
Choosing a location for your basket seat.
How do you envision yourself using a basket seat? Are you aiming for a reading nook, or hoping for a place to meditate? Are you adding the seat as another option for a conversation area, or do you want more seclusion? Have you considered sun versus shade? Ask yourself these questions as you choose a location for your basket seat.
Installing your basket seat.
Many basket seats come with a stand, so all you need to do is set it up wherever you want it. This option is simple, because you can always move the seat if you change your mind about the location.
However, you might prefer a more permanent mounting for your basket seat. You could be concerned about boisterous kids knocking it over, or simply prefer more support. Basket seats can be mounted from a sturdy structure such as an overhead beam, sturdy arbor, or even a tree limb. Consider the typical weight load of the seat before choosing a spot to mount it.
Consider privacy.
If it’s a quiet reading nook or meditation space you’re after, you probably prefer for that time to be uninterrupted. Consider placing your basket seat in a more private area of the yard, if possible, and landscape around it. A fast-growing shade plant like bamboo can be used to create the perfect retreat. Or, if you prefer the aesthetics of blooming shrubbery, consider viburnum, hydrangea, or camellias. A simple boxwood shrub or two will also grow quickly and provide privacy, without requiring overly complicated care.
If you’re considering a patio install, arbor, or other permanent structure for your backyard retreat area, call us to discuss your vision. We can help you explore your option and arrive at a design that suits your needs.

Many lemon trees produce fruit sporadically throughout the year but tend to show a burst in production in late spring or early summer. So, those of you with a lemon tree might have quite a few lemons that you’re ready to use. How about some refreshing summer lemonade – either the classic variety or with a twist?
Most lemonade recipes begin about the same: You take equal proportions of sugar, water, and lemon juice, and mix them together. For the sake of simplicity, start with one cup of each.
But because simple mixing won’t dissolve the sugar (it will just sink to the bottom instead) the better recipes will advise you to create a simple syrup first. You do this by mixing the sugar and water in a saucepan and heating until the sugar is dissolved.
While your syrup is simmering, juice the lemons. Four to six lemons will yield about one cup of juice. Pour your syrup into a pitcher, add the lemon juice, and then dilute the mixture with two to three more cups of cold water. Add the water slowly, tasting your lemonade as you go, to achieve the right balance of sour and sweet. Everyone’s taste buds are a little different, after all!
The above recipe will produce a classic summer lemonade, but why stop there? If you enjoy getting creative in the kitchen, try infusing your lemonade with another flavor such as strawberries, raspberries, or blackberries. Simple cut up the fruit and leave it in the pitcher of lemonade overnight.
And, of course, some might want to add an “adult” twist to their lemonade. You can find plenty of lemonade cocktail recipes online, such as Kentucky lemonade which combines lemonade, ginger ale, mint leaves, and bourbon. Or, try out a Fireball pink lemonade, made from lemonade, cinnamon whiskey, and grenadine.
These ideas are just the beginning… Have fun exploring different ideas and serve up a batch of your very own homemade lemonade at your next cookout.

You want to look out the window to view a lawn that is lush, green, and tidy… But lately, things are looking a little wild out there. If you’re wondering how to care for your lawn in the summer, you’ve come to the right place.
Early in the summer…
● Apply a light fertilizer, if needed, to support your lawn’s health
● Apply an appropriate weed control
● Identify pests to determine whether you have the kind that will harm your lawn (grubs and caterpillars)
● Observe your lawn regularly for wilting or brown patches; treat for pests or other culprits before the problem becomes severe
● Water deeply and regularly, preferably early in the morning
● Mow the grass “high” to ensure deep roots and moisture retention in the soil
● Leave the grass clippings on the lawn, and they will feed the soil as they break down
In the middle of summer…
● Don’t fertilize cool-season grasses, like fescue and Bermuda, during the height of summer
● Keep your mower blades sharpened
● Continue to mow high; cool-season grasses won’t grow rapidly during summer, so there’s no need to worry about the lawn getting out of control
● Continue to water deeply (at least one inch of water per week)
● Evaluate your lawn for signs of a fungal infection, and apply an anti-fungicidal treatment when needed
● Apply grub control to reduce hatching grubs in the coming months
In late summer…
● Mow the lawn very low, then aerate to relieve compaction and bring air to the roots
● For cool-season grasses, late summer to early fall is the time to apply fertilizer generously
● Overseed the lawn if areas have died during the summer
If you have any other questions about caring for your lawn this summer, don’t hesitate to call us. We can help you troubleshoot any problem areas and recommend the right treatments to fix them.
If you thought the hundred-year-old oak in your city park was impressive, you won’t believe how long some trees can survive! Many of these ancient trees are located in or near popular tourist destinations, so you can even go visit them if you like.
Methuselah.
Thought to be the oldest living tree in the world, the Biblically-named bristlecone pine is located in the White Mountains of California. It is thought to be nearly 5,000 years old!
Jaya Sri Maha Bodhi.
This fig tree began as a sapling from the famous Bodhi tree, under which Buddha sat as he attained enlightenment. At over 2,300 years old, the Jaya Sri Maha Bodhi is the oldest-known human planted tree in the world. We know this because the exact date of planting was recorded in 288 BC.
Gran Abuelo.
At over 3,600 years old, Gran Abuelo (Spanish for “great grandfather”) is South America’s oldest tree. You can visit the ancient cypress at the Parque Nacional Alerce Costero in Chili.
The Three Sisters Cove.
The Black River Preserve of North Carolina features hundreds of ancient bald cypress trees, one of which is over 2,600 years old. The swamp isn’t easy to travel, however, so plan for a kayaking trip!
Mongarlowe Malee.
Located in New South Wales, there are only six of these critically endangered trees left in the world. The oldest individual is estimated at 3,000 years old, but some disagreement remains among botanists. Two other specimens are thought to have split from the original rootstock. If this is true, their age of 13,000 years would make them the oldest living trees on earth.
Fortingall Yew.
At an estimated age of 3,000 years, this yew tree in Perthshire, Scotland is thought to be the oldest tree in Britain.
General Sherman.
The Sequoia National Park in California is home to General Sherman, a giant Sequoia tree thought to be between 2,300 and 2,700 years old. Its other claim to fame is that, at a height of 275 feet and a diameter of 36 feet at its base, General Sherman is believed to be the largest tree in the world.
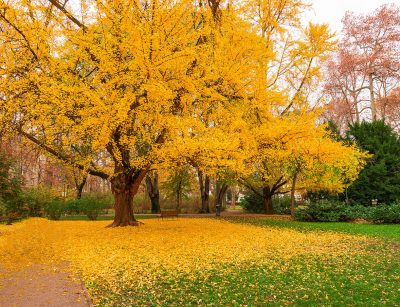
Gingko trees.
Ginkgos are believed to be the oldest surviving species of tree and are renowned for their brilliant golden foliage. The species itself dates back to before dinosaurs roamed the Earth! One of the oldest individual Gingko trees resides at the Gu Guanyin Buddhist Temple in the Zhongnan Mountains of China. Each year, tourists flock to visit the 1,400-year-old specimen.
The trees listed above are just a small sampling of some of the oldest trees in the world. Check out the list Wikipedia to find dozens more, many of which are located in the United States.

Your roses will be in full bloom this summer, offering luscious scents and beautiful blooms for you to enjoy. But since many roses can be a bit picky, follow these tips to properly care for them during the hot summer months.
Watering is essential.
Roses can suffer in hot, dry weather, so ensure that you’re watering them on a schedule. A deep soaking, about every two weeks, is preferable to more frequent but shallow waterings. Apply water directly to the soil, rather than overhead, because wet foliage can lead to various diseases.
Mulch to preserve moisture.
To ensure your deep waterings are effective, help the soil retain moisture by mulching around your roses. Use two to four inches of wood chips, pine needles, shredded bark, or cocoa bean hulls in your rose beds.
Fertilize.
Roses should be fertilized three times per year: First in the spring right after pruning, then during the first bloom period, and then once more in mid to late July. Use a 5-10-5 or 10-10-10 fertilizer, and water deeply afterward.
Deadhead to preserve energy.
To conserve the plant’s energy and encourage repeat blooming, remove faded blooms regularly. During the first year of a rose plant’s life, remove only above the uppermost 3-leaflet leaf. In established plants, you can cut back the stem to a 5-leaflet leaf. Leave at least two 5-leaflet leaves on each shoot.
Ward off pests and diseases.
Diseases are more prevalent during times of rainy weather, due to retained moisture on foliage. During these times remember to use a fungicidal spray, and use the treatment regularly before symptoms of disease appear. Spray both the tops and undersides of leaves.
As for insects, you can opt for an insecticidal spray, or go for a more natural approach. Mix one tablespoon of vinegar with one cup of water. Then add one and a half tablespoons of baking soda, one tablespoon of dish soap, and one tablespoon of vegetable oil. Stir this solution into one gallon of water, and spray your plant’s foliage thoroughly to ward off pests.
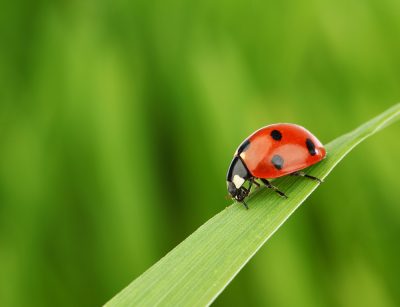
And, of course, the old trick of releasing ladybugs to control an aphid population will often work perfectly.
If you have any more questions about roses in relation to your landscaping, feel free to give us a call. We can help you learn how to keep your roses in tip-top shape all year.

Many of us will be celebrating the fourth of July at home this year, so why not make it the best Independence Day ever? These ideas can help you plan the perfect BBQ island space.
Location.
You can install a BBQ island anywhere in your yard, but you will probably prefer it on a porch, patio, or poolside deck. Consider the proximity to your lounging and eating areas. Also, ask yourself whether you’d prefer to run a gas line to the island, haul a heavy tank back and forth on occasion, or simply opt for a charcoal or pellet grill.
Shape.
How much room can you spare for your BBQ space? Do you prefer a simple straight island, or something L- or U-shaped? If you opt for one of these shapes, you will enjoy more prep space. Plus, A U shape can work to keep wandering kids out of the area.
Cooking options.
Are you wishing for a simple grilling area, or would you be interested in adding a smoker, fryer, or other cooking options? Consider these ideas carefully before you build, so that you can design the right space for your needs.
Storage space.
By opting for a bit of enclosed storage space, you can cut down on the need to carry extra items back and forth from the house.
Aesthetics versus durability.
Brick, cement, stone, or tile are all durable materials that will compliment your home’s exterior. Or, you might prefer the sleek look of stainless steel. As with other outdoor features, these materials are your best bets for durability in all types of weather. If you prefer a simple wood cabinet structure, these work best under a covered porch or awning.
Other features.
If you don’t mind a bit of plumbing or electrical work, adding an outdoor sink or small refrigerator will take your BBQ island to the next level of luxury. And if you’re running wiring anyway, why not add Bluetooth speakers or even a weatherproof TV screen?
If you’d enjoy a cool place to store drinks without the hassle of installing electricity to the island, a drink cooler only requires a bag of ice.
As you can see, a BBQ island can be as simple or as luxurious as you’d like. Either way, we can help you design one that fits your aesthetic preferences and budget. Give us a call and we’ll discuss your plans to upgrade your backyard this summer.
We all love nature, but there are some elements of nature that need to stay out of our gardens! Here are some ways to give Peter Rabbit the boot, without resorting to chemicals, poisons, or trapping.
Rabbits.
Rabbits are actually repelled by some plants, so including tomatoes, rhubarb, garlic, hot peppers, basil, mint, and catnip in your garden will work like a charm. Also try scaring them away with coyote urine, cayenne pepper, or toy snakes placed strategically around the garden. Just don’t forget the “snakes” are out there, or you might scare yourself away, too!
Moles.
Moles, or meadow mice, can damage plants and young trees by tunneling underneath them. They prefer burrowing under weeds and mulch, so keep the garden well weeded. Remove weeds in a four-foot diameter around saplings and keep ditch banks and the edges of your yard well mowed. Raised beds can be the better choice when moles are particularly ruthless.
Groundhogs.
Not only do groundhogs damage your lawn by digging deep tunnels; they also love to munch on your favorite flowers and vegetables. If you use a barrier such as fencing to keep them out, sink it at least twelve inches deep. Dig your beds two feet deep and cover with wire mesh before planting or use fine mesh around root balls when planting.
Snails and slugs.
Snails and slugs will gobble up vegetation and leave you endlessly frustrated. Fortunately, a saucer of beer makes an excellent trap. Or, try a ring of copper wire around the base of each plant. The slight electrical charge repels snails and slugs (remember to keep the wire off of your plant stems, though).
Birds.
Birds can pick berry bushes or dwarf fruit trees clean in a matter of hours! Fortunately, simple netting, secured at the bottom, will do the trick. Deterrents such as scarecrows, foil strips, and plastic owls also work well, but you must change them about once per month as birds grow accustomed to them.
Insects.
Identify your garden insects before making a plan to deal with them, because some are beneficial. For example, ladybugs eat around 75 aphids per day, but won’t bother your plants themselves. In fact, releasing ladybugs can actually help you control other insect populations! Other beneficial insects include green lacewings, pirate bugs, soldier bugs, and praying mantis. Research your particular garden pest and release the appropriate helper bug to control their population.
For many critters, including deer, skunks, opossums, and raccoons, fencing or other physical barriers can be your best deterrent. Give us a call if you would like to discuss landscaping measures to better secure your yard, and we can help you decide if a physical barrier would be a good option for you.

Now that summer is arriving, you might want to spend more time outdoors. But outdoor time doesn’t have to be all sweat and exercise! If kicking back and enjoying a movie or your favorite Netflix series is more your speed, how about setting up an outdoor theater?
It’s easier than you think, thanks to special equipment designed for outdoor setups.
Choose a projector. Look for one with a minimum of 2,000 lumens of brightness and HD resolution. You probably won’t enjoy outdoor movies if the quality is far inferior to what you enjoy indoors.
Consider placement. Where will you be sitting; on your patio furniture, or on blankets in the yard? Or, do you plan to watch the screen from your pool? Distance will influence the size screen you want to purchase, and also the placement of the projector. Remember that your projector’s HDMI cord needs to reach its source, and that you will need a power supply.
Shop for a screen. Your screen can be as simple as a white sheet strung across the fence, or as fancy as an inflatable big screen with cinema-grade materials. Consider your set-up time, as well as factors such as wind (which can ripple more simple screens).
Consider audio. Some projectors provide decent sound, but that depends upon your preferences. If you prefer a more high-tech theater experience, portable outdoor speakers can be placed where you want them.
What about the source? You’ll need a reliable high-speed internet connection if you want to stream movies or TV shows from a device. Otherwise, you could go with a basic DVD player or play downloaded movies from a laptop.
A few reminders. Remember not to leave equipment out in the weather, and keep food and drinks away from laptops, streaming devices, and speakers. And don’t forget to turn off your automatic sprinkler system during movie time, unless you’re looking for a surprise “water effect”!

If you’re planning to stick close to home this summer, you might have heard the concept of a “staycation”. Essentially, you take time off of work and engage in fun recreational activities – but from home! It’s a great way to spend time with your family, but without the hassles and hazards of extensive travel. Plus, staycations are certainly much more affordable!
If you’re considering a staycation, we do recommend that you spend a considerable amount of time outdoors. Having fun outside is a great way to combat boredom and pass the time, plus it’s healthier for you.
But what will you do? Depending on your family’s interests, installing a recreational landscape feature might be right up your alley! Some unique ideas include:
Giant Jenga
Giant dominoes
Giant yard dice
Outdoor chess or checkers
An in-ground trampoline
Ladder ball
Kubb
Corn hole
Splash pad
Volleyball court
Reading nooks
A “glamping” space
A tree fort
Obstacle course
Outdoor home theater
Tiki bar
Mini-amphitheater for puppet shows or family musical performances
… and anything else you can dream up!
These ideas can run from simple and affordable, to quite elaborate. Consider factors such as the age of your kids and their interests before investing your time and energy into the project.
Ask yourself, also, if the space you’re designing could serve multiple purposes, or be adapted in the future as needs change. For example, a sand volleyball court can also double as a sandbox for younger children.
Finally, it’s good to remember that “social distancing” won’t persist forever. It won’t be too long before we can all enjoy backyard barbecues and family reunions again. So choose a feature that can entertain guests someday! If you have any questions about these projects, contact us about a quote for installation.

If you’re looking for an outdoor activity to stay busy and safe at home, why not try your hand at gardening? The following are just some of the reasons that gardening can benefit your health while also keeping you entertained.
Reduce stress. Just getting outside often reduces anxiety noticeably within minutes. Even better, gardening provides light exercise that almost anyone can do. Focusing on creating something beautiful in your yard, and watching your hard work pay off in the form of attractive flowers or delicious veggies, brings a sense of satisfaction and accomplishment.
Do your part. During World War Two, the nation faced food shortages due to production difficulties and the need to send food to soldiers overseas. So, many families began planting “victory gardens” to support the war effort. More food produced at home meant less strain on the supply chains.
As the media reminds us that production disruptions continue to occur due to the coronavirus outbreak, it couldn’t hurt for all of us to grow a small garden of our own. Each vegetable that you produce at home means one left on the shelf at the store, for someone who can’t grow their own food.
Provide food for your family. And, of course, you’ll enjoy all the delicious vegetables you grow at home! Not only does fresh produce taste better when it’s harvested straight from your yard; you can ensure that it is grown organically and picked at peak ripeness. When fruits and vegetables are sourced locally, they are eaten more quickly before their important nutrients begin to degrade.
Fresh air, sunshine, and more. Staying cooped up in the house can lead to feelings of lethargy. Getting some fresh air is often all we need to perk up. We also know that exposure to sunlight prompts our bodies to produce vitamin D, which is essential to bone health and healthy immune function. And guess what: Digging in the dirt exposes you to all sorts of beneficial microbes. Unless you’re immune compromised, getting dirty in the garden is actually good for you!
Call us if you’re interested in installing a vegetable garden or installing fruit trees. We can help you fit the project into your existing landscape, and answer any other questions.

We hope you are all staying safe and healthy during this challenging time. Since construction is considered essential in our state, we are definitely still working. However, since some things have changed, we wanted to take a moment to let our clients know that we’re taking measures to keep you and our workers safe.
More virtual work. If you call us to inquire about a new landscaping project, we do need to come out, view the site, and take measurements in person. However, this will obviously take place outdoors, and keeping our social distance is not a problem.
We can discuss the details of the project, including sharing photos, over a Zoom meeting. We also conduct all of our presentations over Zoom, and we’re happy to report that these virtual meetings are working out fantastically.
Safe work on site. Of course, landscaping installations cannot be performed over Zoom. So we do have our workers on job sites, but we are taking measures to keep them (and you) safe.
Being outdoors is already considered safer due to greater distance between people, fresh air, and the beneficial effects of UV rays from the sun. But we do make sure workers have access to plenty of disinfectants, and they travel in separate vehicles to cut down on close contact.
Convenience for clients. If you have questions about an ongoing project, there’s no need to even leave the house. Just give us a call and we will endeavor to answer your questions and provide pictures when necessary. Technology has certainly provided a great benefit at this time!
We will continue to do our part to slow the spread of coronavirus, while providing the same level of professionalism you’ve come to expect from us. Please call if you have any questions about our services at this time, and we will be happy to assist you.

At first glance, the sight of a salad adorned with fresh flowers might appear attractive to you, yet unusual. You might wonder if anyone actually eats flowers… And the answer is yes! Not only are many types of flower edible; they can add a distinct and delicious touch to many dishes!
It’s important to remember that not all flowers are edible. In fact, some can even be poisonous. So this is not an area in which you want to conduct culinary experiments. Instead, make sure you stick to this list.
Anise Hyssop
Angelica
Apple
Arugula
Basil
Begonia
Bergamot
Borage
Calendula
Chamomile
Chervil
Chicory
Chives
Chrysanthemum
Cilantro
Clover
Cornflower
Dandelion
Day lilies
Dianthus
Dill
English Daisy
Fennel
Garlic
Hollyhock
Honeysuckle
Impatiens
Johnny-Jump-Up
Lavender
Lilac
Marigold
Mint
Nasturtium
Pansy
Pea
Phlox
Primrose
Queen Anne’s Lace
Rose
Rosemary
Safflower
Sage
Sorrel
Squash blossoms
Sunflower
Violet
Most of these flowers can be easily grown in your garden, with appropriate care. Of course, some (like apple blossoms or squash blossoms) are not just ornamental flowers, but require dedication to an entirely different type of plant. Squash is obviously a great choice for your vegetable garden, so it might please you to know that you can eat the blossoms, too. But you probably wouldn’t plant an entire apple tree just for the flowers.
Generally speaking, it is best to eat these flowers only if you purchase them from the produce section at the grocery store, or grow them yourself. Varieties meant to be purely decorative might have been sprayed with chemicals that should not be consumed. Naturally, you can control this factor by simply growing your own edible flowers.
Of course, most of these flowers also make terrific additions to your garden. Call us for advice if you’re considering a new decorative flower bed, and we can help you design a landscape feature that is both attractive and edible if that idea appeals to you!

As spring arrives, you probably want to inspect your plants and begin making plans for your warm weather garden. If you notice something going wrong with your camellias at this time, it’s likely to be a fungal disease called camellia dieback.
The fungus G. cingulata infects camellias via pruning wounds, grafts, or leaf scars. After spending the winter undetected, the cankers on infected plants begin to ooze masses of spores (usually an orange-pink color). The spores spread via infected pruning tools or splashing water, and you might begin to notice signs of disease at this time.
What does camellia dieback look like? At first, diseased leaves turn dull and yellow, and then wilts and/or turns a reddish brown color. Shoots or branches begin to die, with dead leaves attached. Cankers form on the base of the dead shoots, or around old pruning wounds. Over time, disease shoots die (in about one to two years) until the entire plant has succumbed to the fungus.
What you can do. As with most diseases, an ounce of prevention is worth a pound of cure. Always clean your pruning tools with isopropyl alcohol or another disinfectant after use, so that you can avoid spreading disease from one plant to another. This could mean the difference between losing one or two plants, or losing a yard full of them.
When pruning camellias, make flush cuts so that they heal quickly. Wounds that are slow to heal are more prone to disease.
Also, routinely inspect camellias for signs of dieback. If you spot cankers on the root collar or main trunk, remove the entire plant and discard it. If the camellia is showing only mild symptoms of the disease you might be able to save it by carefully removing cankers on green wood.
You can apply a fungicide to plants that show only minor symptoms of dieback, but seriously diseased camellias usually cannot be saved. Follow the instructions on the container precisely.
If you have questions about your landscape, or need to replace lost plants with hardy varieties, give us a call. We can help you evaluate your situation and make recommendations for landscaping options that suit your needs and preferences.
The dinosaurs might have died out millions of years ago, but many of the plants alive during that time still survive today! Some are the sole surviving species of their genus or family, and remain virtually unchanged from prehistoric times. Current conservation efforts aim to preserve these species for many years to come.
Moss. Believe it or not, many species of moss have been around for about 470 million years. Today we use moss in food, horticulture, medicine, home decor, and more applications. It’s so versatile that you can utilize moss in a variety of garden settings or even bring it indoors to decorate your home.
Gingko tree. Dating back 270 million years, the gingko tree is still widely cultivated due to its brilliant yellow leaves. Also known as the maidenhair tree, gingkos are the sole surviving member of the plant division known as Gingkophyta.
Agathis. These ancient coniferous trees date back to about 350 million years ago. Most members of the Auracariaceae family became extinct due to the same event that wiped out the dinosaurs, but a few such as the Agathis persevered. Today the wood of these trees is used in yacht construction, house construction, manufacture of ukuleles and guitars, and much more.
Horsetails. Today, about twenty species of Horsetail still survive from their prime time about 300 million years ago. They exist all over the world, but especially in the non-tropical areas of the Northern hemisphere. These unique plants are used in food, medicine, herbal remedies, and wood polish.
Cycads. Cycads date back 280 million years, and perhaps even farther back than that. Not only are they an ancient species; an individual Cycad can live for up to 1,000 years! Their distinct appearance makes them popular ornamental plants, but they are also used in medicine, gum, fiber manufacturing, and even oil production.
If you’re interested in cultivating a prehistoric garden space, you can be sure these plants will make an eye-catching focal in your yard! Give us a call if you’re considering a new installation, and we can help you select hardy, long-lasting ornamental plants that will stand the test of time.

Easter is soon to arrive, and spring will be in full swing along with it! You probably want to enjoy a little outdoor time with your family on this day, even if larger gatherings are cancelled at this time. The following ideas can get your yard looking its best in time for Easter weekend.
Refresh flower beds. As the seasons change, your flower beds might be looking a bit tired. Clean out dead or dying flowers, freshen up the soil with some compost and fertilizer, and plant new bulbs or seedlings. Separate daylilies if needed, and put down some fresh mulch in beds that need it.
Move potted plants outdoors. If you haven’t already, now is the time to move any cold-sensitive plants back outside. Fertilize those that need feeding, so that new spring growth will begin peeking through soon.
Create a fairy garden. If you’re looking for a fun project for the kids, a fairy garden can become an ongoing project that everyone enjoys. Add miniature houses, rocks, toadstools, small wading pools, and other features to an existing garden space (it will give you a fun place to hide Easter eggs, too).
Create an Easter tree. Hang brightly colored plastic eggs from a tree or shrubs. If you want to get even more creative, search Pinterest for crafty Easter-themed ornaments that you can make with supplies you already have on hand.
Get your vegetable beds ready. If you’re planning to plant a vegetable garden this year, now is the time to clean out raised beds, till your soil, and pull out any weeds that have accumulated over the dormant season. Mix some compost and fertilizer (such as manure) into the soil so that your veggies will be well fed throughout the summer.
Install a new feature. Spring is the perfect time for new projects, like adding a row of hedges or installing a water feature. Just one new focal point will add curb appeal and make your yard feel brand new. Give us a call about any new installations you’re considering, and we can help you design just the right project for your yard.

If you’ve ever visited botanical gardens, or even Disneyland, you might have marveled at the beauty of topiaries. They do add a whimsical, striking effect to your landscape, and learning to make them yourself can be fun (plus help you save money).
Basically, there are two ways to make topiaries: You can construct them from vines that you grow over a topiary form, or you can prune shrubs into the desired shape.
If you want to make a topiary with vines…
Choose your topiary form. You can purchase them pre-made from wreath wire, or make them yourself.
Decide upon your vining plant. English ivy is the most common choice for topiaries, because it grows quickly and is very hardy. But you can use any vining plant for this project.
Fill your topiary form with sphagnum moss. This step isn’t required, but it will help your topiary take on the desired shape much more quickly.
Plant the vine. Place your vining plant so that it can grow up the form. If you’re creating a larger topiary, you might wish to plant several vines.
Train the vine. As your vine grows, adjust it so that it wraps around the form appropriately. Trim off any shoots that resist training.
If you want to make a topiary with shrubbery…
Choose a young juvenile shrub.
Select a topiary form and place it over the shrub. Yes, some professional topiary artists will prune shrubs into intricate shapes without using a form, but even professionals often use them. So it’s perfectly fine for a beginner to do so!
Gradually prune the shrub into the appropriate shape. Prune an inch off of areas where you need to stimulate growth. Keep in mind that trimming more than 3 inches can kill off that area of the shrub. The idea is to shape the shrub as it grows into the desired shape. Steady, consistent effort is key; don’t let your shrub become overgrown, because it’s much easier to gradually shape than it is to cut it back and start over.
Once you have achieved the shape you want, you will continue to train and shape the topiary. About every three months during its active growth season, you will need to gently prune it back into the correct shape.
If you’d like any more advice on incorporating topiaries into your landscape, give us a call. We can help you decide upon the type of plant you should use for your project, help you choose a shape that will complement your space, and answer any other questions you might have about your landscaping.
We often hear that the French live healthier lifestyles overall, so you might be interested in how exactly their diets and habits are different from our own. We know that the French incorporate more fresh fruits and vegetables into their diets, and in fact, 23 percent of the produce consumed by the average French person is grown in their own gardens.
Traditionally, this practice is called a potager garden, and the emphasis is on growing plants that can be used in one’s own cooking. These organic kitchen gardens are more concerned with biodiversity than imposing order, and so they tend to help preserve heirloom varieties of fruits and vegetables.
So, not only do the French grow more fresh food right outside their doorsteps; they also enjoy the exercise and fresh air involved in gardening. If you’re curious about starting your own potager garden, just consider the following factors…
Location. Choose a spot in your yard that is readily accessible to the kitchen, if possible. Consider, also, the amount of sunlight the location receives, and the level of competition from nearby shrubbery and other landscape features.
Consider overall design. Informal, country styled gardens don’t necessarily utilize neat rows and wide pathways. Utilize every spare inch of space by choosing a spiral, checkerboard, or wagon wheel design. Then let companion plants, mulch, or volunteer plants fill in the spaces.
Utilize vertical space. Consider trellising plants such as peas, beans, or cucumbers in order to maximize space usage. Fruit trees or berries bushes at the periphery can provide an additional source of nutrition. Of course, consider whether vertical plants will block vital light to others, and place them accordingly.
Research companion plants. Certain plants do well when planted side by side, whereas others will interfere with one another’s growth. Since a potager garden tends to include many different crops in close proximity, you want to ensure that you don’t undermine your own efforts by planting competing plants together.
Plant what you enjoy. Plant your favorite fruit, vegetable, herb, and flower varieties for maximum enjoyment and usage of your potager garden. If you hate tarragon, for example, there’s no reason to include it.
Of course, you should also consider our climate here in Southern California. Research growing zones and learn when to plant different crops for maximum output, and make sure to water everything accordingly.
Contain aggressive species. Some herbs, like mint and tansy, can be aggressively invasive. Such species should be grown in containers so that they don’t take over the rest of your garden.
Experiment and have fun. With gardening, sometimes things don’t always work out exactly as you envisioned. But the wild and eclectic look of potager gardens lends itself well to this risk factor, so just enjoy the experiment and have fun!