
Even though the landscape design world has changed significantly in the past few years, Traditional concepts aren’t going away. In fact, Traditional styles are still extremely popular; we just find new ways to keep the concepts fresh and interesting for homeowners who want a classic look that is up to date.
Typically, traditional landscaping includes what you might expect: A vast expanse of a lush green lawn. Having said that, we can offer a number of choices with regard to groundcover, so that you can achieve the look of a lawn with the amount of upkeep that you’re willing to perform.
Traditional landscape design also tends to feature elegant hardscape, from materials like pavers, brick, and gravel. These pristine, structured yards feature neat hedges and classic flowering plants, and generally require more maintenance.
Even with their commonalities, traditional styles do fall into various subcategories like Formal Traditional, Standard Traditional, Cottage Garden, Craftsman, French Country, Mediterranean, and Rustic.
For those who are seeking a sensory experience in their home spaces, French Country style might be the answer. French Country combines elements of several other styles, such as Rustic and Traditional, and tends to appeal to all five senses. Olive and lemon trees provide a European flair, lavender appeals to both sight and smell, and Sweet Bay Laurel can be used as an ornamental hedge. As a bonus, French Country blends well with a variety of hardscape materials, so this design concept might work with what you already have.
Let’s talk about Mediterranean style, because it often goes so well with the architecture and climate here in Southern California. To achieve a Mediterranean look, opt for organic shapes, textures, and colors. Picture lots of wood and stone in warm colors, rounded edges, and pops of bright color from flowering plants. Add a small Mediterranean herb garden for an authentic touch to both your landscape and your cooking. You’ll need it, because Mediterranean style practically begs for dinner guests outside on the patio.
Now that we’ve highlighted a couple of the more popular Traditional styles for 2022, let’s move along to our last blog in this series. Next, we’ll discuss Modern design trends, and how we see that style evolving in coming years.

In last week’s blog, we focused on learning the foundational terms of describing style. Now, let’s focus on a popular combination of several styles: Contemporary style.
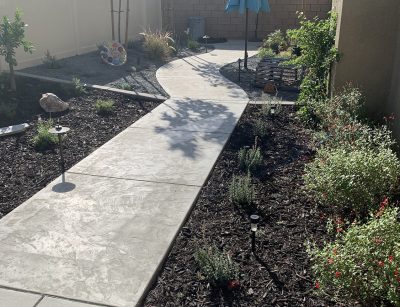
What is Contemporary style, with regard to landscape design? Contemporary style reimagines several other design concepts, and shows up in a range of current trends. We tend to see a lot of hardscaping in Contemporary designs, which combines functionality with attractive angles and contrasts. Hardscape in Contemporary design often incorporates cooler tones, like pea gravel, concrete, and lighter woods. And as a bonus, hardscaping is easy to maintain.
Contemporary gardens are generally planned around clean lines and neutral tones. Plantings – particularly here in Southern California – might include grasses, low maintenance roses, agave, and shrubs like white sage.
As for furniture, we would expect simplicity, clean lines, and neutral to cool colors.
Many of the trends we’ve seen in recent years could be considered Contemporary. These would include:
- Meadow or grassland
- Tropical
- Desert
- Xeriscape
- Southwestern
- Coastal
- Family Friendly
- Transitional
- Edible gardens
And while a full description of each of these styles might turn this blog into a landscape design textbook, we do want to highlight a few of the most important trends.
Xeriscape, or low-water landscaping, requires little to no irrigation. This makes it the perfect landscape style for those of you who want something simple but attractive, and stylish but affordable. Xeriscaping is planned around permeable gravel or mulch, and includes native plantings with low to no water needs. And talk about low-maintenance! You will thank yourself when you see your water bill after installing a xeriscape.
On a similar note, desert landscaping has also made significant headway in the design world. We start with a base of decorative gravel or decomposed granite, and then drought-resistant plants (not only succulents!). Stick to tan as a base for your color pallette, and add large boulders for interest.
And of course, edible gardens have become more popular in recent years, due to the desire for fresh organic food and the rising prices of groceries. We can help you design a landscape around an edible garden, so that your yard is both beautiful and functional in the most important way!
Contact us to learn more about any of these Contemporary style landscapes, and check out our following blogs in this series for more of the latest landscape design trends.
A lot has changed in the world of landscape design over the past couple of years. So for this month, we wanted to use a series of blogs to update you on this year’s most current styles.
While there’s no need to stick to the strict confines of a label, words do help us to communicate our overall vision. And so, the first step to understanding the latest trends is to grasp the concepts behind each trend’s name. Four key terms are used to describe most design concepts: Modern, Traditional, Formal, and Informal.
Modern refers to…
- Clean lines and sharp angles
- Muted colors
- Emphasis on height and texture
- Few to no flowers
- Cool gray tones
- Wood and concrete as primary materials
- Little to no ornamentation
- Emphasis on materiality
Traditional refers to…
- Curving lines and rounded corners
- Bright colors
- Green shrubs
- Species diversity
- Plentiful flowers
- Stone and brick as primary materials
- Warm neutral tones
- More ornamentation
Formal refers to…
- Recognizable shapes or patterns
- Geometric groupings
- Straight rows
- Symmetry
- Less species diversity
- Less “naturalistic”; more polished
- More ornamentation
- Refined textures
- Stainless steel, stone, tile, or finished wood as materials
Informal refers to…
- No recognizable shapes or patterns
- Absence of straight lines
- More species diversity
- Naturalistic groupings
- Rougher textures
- Humble materials, such as corten steel, decomposed granite, and weathered wood
Now that you understand the basics of these terms, think of personal style as falling somewhere on a grid. Modern and Traditional define the extreme ends of the x axis, and Formal and Informal lie at the extreme ends of the y axis.
Your design concept will fall somewhere on this grid; most people don’t want a look that strictly falls into only one of these categories. For example, you might want something modern with a few traditional touches, that is moderately formal with a few informal touches.
And that’s what we’re here for! We can help you evaluate where you fall on each of these spectrums, so that you can clearly communicate your ideas to our design team. Now that you understand the very basics of personal landscape style, check out our following blogs in this series.

Wood is perhaps the most commonly used material for a number of home and landscaping uses. But as we all know, wood can discolor, warp, crack, and show its age before long. The sun and rain can do serious damage over time, and you can’t exactly control those. So, what can you do to protect your decks, fences, posts, planter boxes, and other wood structures outside?
Luckily, it’s not as difficult as you might think.
Inspect structures yearly. Check for splitting and warping and repair any boards that have come loose on fences and decks.
Clean structures once or twice a year. Power washing can be helpful against mildew, pollen, and any other debris that has accumulated on wood structures. Use a cleaning solution specially made for decks if you want to restore the wood’s original beauty.
Check to see if the wood should be resealed. Pour a cup of water on the wood. If the water soaks in quickly, it’s time to reapply a sealant.
Apply a sealant, stain, or paint. You can choose from a number of options once you’ve decided to weather-proof a wood structure. Paint is great for adding color, but keep in mind that it will crack and peel over time. For that reason, paint is not recommended for decks.
A clear, water-repellent sealant will allow the natural beauty of the wood to shine through. However, because it does not contain pigment, the protection will only last about a year before you need to reapply the sealant.
A pigmented stain is your other option. It soaks into the wood, so you can add some color without the problems created by paint. And because of the natural UV protection offered by pigment, a stain offers better protection against the weathering effects of sunlight.
Whatever you choose, apply your sealant, stain, or paint after your wood structure has been cleaned and dried. Choose a sunny day with little to no wind, to improve drying time and prevent the job from becoming messy.
With proper care, wood structures will last many years. But at times they do need to be replaced. Call us to discuss your landscaping project, and we can help you choose durable materials and learn how to take care of them in the future.

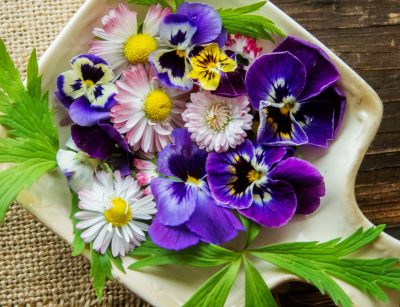
Now that spring has arrived, you’re probably thinking about seasonal crafts and holidays. If you’re trying to decide what to gift your loved ones for Easter, why not combine these two ideas and make them a special basket right from your own garden? They will receive a gift made with love, and you (and your kids, if you have them) will have fun creating it.
What about a gift basket full of seedlings that you can share with friends to help them start their own spring gardens? Start by selecting a basket of the appropriate size for the gift that you want to give. Then, fill it with potting soil and start selecting young plants from your own garden.
Herbs are a good choice, because they’re easy to grow and almost everyone enjoys fresh herbs for cooking. If the gift recipient has room in their yard for a larger garden, consider a few vegetable or strawberry plants as well. Include one or two blooming flowers, and you’ve created a gift basket that is both practical and beautiful to present.
Remember to vary planting heights, with taller plants in the back of your presentation and shorter ones in the front. Mix a few different types of plants, for a variety of leaf size, texture, and color, for a more interesting look. Include labels so that your friend can easily identify their seedlings and correctly replant them in their own garden.
Other fun gift ideas that you could toss into these baskets include seed packets, a new pair of gardening gloves, a trowel, or a sun visor.
Or, if you want to go with a more traditional Easter basket full of candy, you can still decorate it with items from your garden. A bed of moss or dried grass is more interesting and environmentally friendly than the plastic grass sold in stores. Twist some blooms or a vine around the basket’s handle, and your gift will seem more special than the baskets sold in stores.
And don’t forget about us! If you have a friend ready to start their own garden, we can help. Tell them to call us about new landscaping additions, and we can help them decide upon size and placement for the best results.
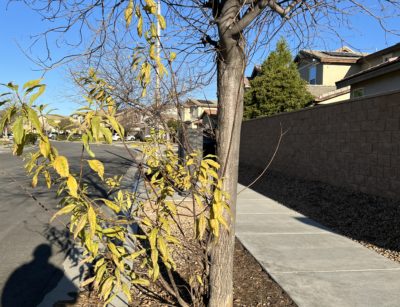
If you see new growths bursting up around the main trunk of your tree, this means your tree is struggling to survive in a stressful situation by producing suckers. You might discover suckers during times of drought, or when your tree is planted in a less-than-ideal location (such as when it is flanked by concrete). No matter the cause, you probably want to know what to do about suckers.
First, just know that the issue with suckers is primarily a cosmetic one, but they are also a warning sign. It’s a good idea to remedy the cause of the problem if you can, since suckers are a sign of stress on the tree. So, if you suspect drought as the cause, watering your tree more often can stop the tree from behaving this way. Of course, if your tree is simply planted in a poor location, all you can do is manage the suckers.
Occasionally, a tree will begin to put out suckers because it is stressed from over pruning. If your tree is getting enough moisture and isn’t planted in a poor location, then you might have over pruned it previously. Take note of this, and don’t be so aggressive next time.
It is important to remove suckers as soon as they appear. Doing so will prevent them from sapping more of the tree’s energy. But you want to remove them correctly, or else they will simply reappear almost immediately.
Using sharp pruning shears or billhook saw, cut the suckers as close to the base of the tree as you can get (but without cutting into the tree itself). Use a pulling action on the suckers to remove as much as possible. If you can remove the nodes from which the suckers originate, this is even better, because it will stop them from returning.
If the suckers originate from under the soil, first try to simply pull them up. If they separate easily, you can probably pull them up along with the nodes. For more stubborn suckers, you might need to loosen the soil around them first. Be careful with digging into the soil; you don’t want to damage the roots of your tree.
If you have questions about your tree’s care, give us a call. We can help you to troubleshoot problems within your landscape and offer practical, long-term solutions to keep your yard and trees healthy.
As we often remind you in our blogs, choosing the right location for a tree is the first step to a successful planting. But this can go beyond simply identifying the right spot in your yard. You might also be wondering if you can plant a tree in an artificial turf lawn, or in decomposed granite or gravel. Do trees have to be planted in a traditional planter bed?
In short, yes, designers can plan for artificial turf installations to go around existing trees, shrubs, and other plants. It is better to install the turf around existing trees (vs. cutting a hole in the turf and planting a new tree, but that can also be done). Just make sure you create the proper edging after adding a tree to artificial turf to prevent future issues. Speaking of potential future challenges, be sure to double check the manufacturer’s warranty to make sure the tree doesn’t void any warranties offered.
If you do decide you’d like a tree in your artificial turf, choose a drought-tolerant species that requires little water or pruning. All trees require some maintenance, but the easier the better in this case. After the tree is planted, be sure to fertilize the tree and provide the right nutrients. The extra heat that artificial turf generates will be hard on the tree, so proper nutrition will be even more important than normal.
Even drought tolerant trees need water (especially with our historically low rainfall of late). One thing to keep in mind is that Southern CA is known for having hard water. Why does that matter? Watering a tree with hard water can lead to staining issues with your artificial turf. You might want to wash the turf off periodically so that those tree-water stains don’t impact the aesthetics of your landscape.
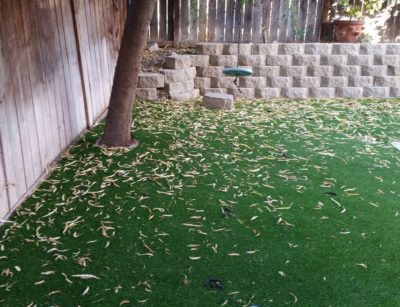
All trees drop leaves (even the evergreen ones). Typically, when you mow grass, the small leaf loss that occurs throughout the year will go unnoticed. Not so with artificial turf. Leaves that fall on synthetic grass need to be removed but be sure not to use a rake with metal tines as that can damage your turf. A leaf blower, broom or plastic rake would be your best bet. We’ve seen some people that prefer a shop vac for this cleanup, but keep in mind that you’ll be needing more sand/infill than normal if you decide to go that route.
If you decide that planting trees in artificial turf is more work than it’s worth, we get it. Other than a traditional mulched planting border, you can also plant a new tree in decomposed granite (aka DG) or gravel. Because these materials drain so well, you’ll need to keep a closer eye on the moisture needs of the tree. Before planting it, amend the soil with nutrient rich compost and verify the functionality of the drip system. Spray systems will not work with this kind of landscape mulch, so drip will be a must.
Dealing with leaves on gravel or decomposed granite can be a bit tricky because you don’t want to move the substrate itself. A leaf blower provides your best option, or you can use a rake with very flexible tines (as opposed to stiff ones).
If you have questions about installing a tree in any type of landscape, just give us a call. We can help you decide which options are best for your situation.
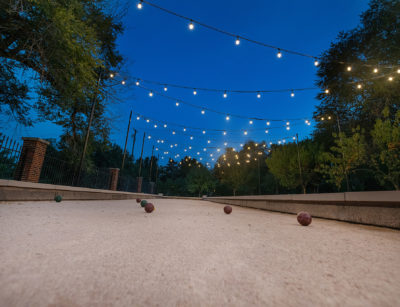
Having your own backyard bocce ball court can provide a lot of fun, but to keep it looking its best, there is some upkeep needed, especially if it is being regularly used for (fun!) game play. So that you don’t feel overwhelmed by figuring out what to do and when, we’ve put together this quick guide.
The main objective is to keep the surface of the court smooth and even, so that you obtain maximum enjoyment from your games.
We do this by dividing necessary tasks into two categories: ongoing maintenance and periodic chores.
Ongoing maintenance: after each bocce ball session, brush the court with a drag broom. Wet the surface evenly and thoroughly to prevent dust. If it’s a new court, rolling it (or tamping it down) can encourage a firmer texture, help the court maintain moisture, and prevent erosion.
Periodic chores: your bocce ball court can suffer from indents and depressions, especially if you use it aggressively. You can detect these issues by looking for water that lingers in certain spots.
Annually, you may need to replace topdressing which is lost over time. Patch depressions and low areas with DG or top surface material. If you didn’t opt for an oyster shell top dressing at the time of installation, this is something that can be added later, if you’d like.
If your court has an artificial turf top layer, follow the normal guidelines for maintaining artificial turf including brushing it up on an ongoing basis and adding more sand/infill as needed.
If you have any other questions, do give us a call.
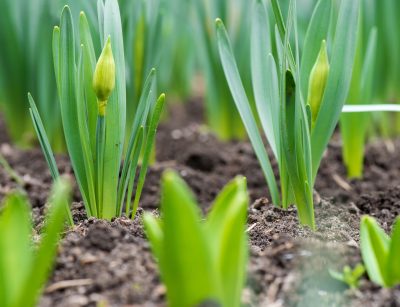
As you might have heard, the various groundhogs around the country could not reach an agreement regarding the arrival of spring. Some predicted an early spring, while others say winter will last six more weeks. Here in Southern California, we don’t have too much of a “winter” anyway! So, we can count on spring arriving right on time, regardless of the opinions of rodents.
So that brings us to the question of your spring garden. What should you be doing right now, to get everything ready for spring?
Start seedlings indoors. If you grow veggies or flowers from seed, it’s time to get your plants started indoors. Remember to keep your seedling trays by a sunny window or invest in a grow light.
Tackle those weeds. Hopefully, your garden wasn’t too invaded by weeds during the cooler months. But you probably do have some invaders to evict. Pulling them now can prevent them from rooting more deeply. Just remember to keep at it before planting time. Unfortunately, weeding is a never-ending chore for most!
Till the soil. Loosen up the soil in garden beds, and till in some compost if you use it.
Fertilize. Just before spring arrives, it’s time to fertilize shrubs, flower beds, and vegetable garden areas. Performing a soil test first can help you to determine which nutrients your soil is lacking, so that you can choose an appropriate fertilizer.
Divide perennials. Some perennials, like daylilies, should be divided and replanted before new growth begins. Doing this prevents them from overgrowing and crowding out other plants in the same bed.
There is one caveat to this rule: If your flowers have already bloomed or are budding, dividing them will have to wait until fall.
Consider new installations. If you’ve been dreaming of a new flower bed, expanding your current veggie garden, or adding rose bushes to your landscape, give us a call. We can help you plan for new additions to add beauty or function to your yard.

Valentine’s Day has arrived, and you might be considering a cut flower arrangement for your special someone. And sure, you can just head to the floral department at your grocery store and pick up an arrangement… And you probably will since it’s February and your garden isn’t exactly blooming in full force right now.
But in the future, a handful of flowers cut from your own garden might seem more special. Here’s what you need to know about growing a flower garden for the specific purposes of making your own arrangements.
Homegrown flowers are fresher. You can quite literally walk out your front door to gather flowers, and present them to your loved one (or arrange them for your own use) in minutes. Grocery store flowers just can’t compete! And of course, the most fresh flowers will last the longest.
Some flowers are better than others… As far as arrangements go. Obviously, most of us will gravitate toward the prettiest flowers when choosing blooms for our arrangements. But beyond that, you want to look for a strong, thick stem (so that it will hold up in a vase). Roses, dahlias, zinnias, geraniums, zinnias, and sunflowers are popular choices for this reason.
Of course, you can also float blooms in a bowl of water if you don’t want to fuss with their stems. Hydrangeas are popular choices for this type of arrangement.
You might also care about fragrance; some roses, for example, are bred specifically for scent, whereas others are not. And finally, you want to consider the “vase life” of a cut flower. Some do well for a week or more, whereas other blooms wilt within a day or two.
Bouquets all year. Yes, it is possible to enjoy fresh-cut flowers all year long! When choosing flowers for your home garden, pay attention to blooming time. Choose a variety of flowers that bloom at different times of the year, and you will always have something beautiful to fill your vases.
And on that note, give us a call to discuss your landscape design if you want to add more flowers. We can help you determine the right species and placement so that your garden produces beautiful blooms of some type, throughout the year.
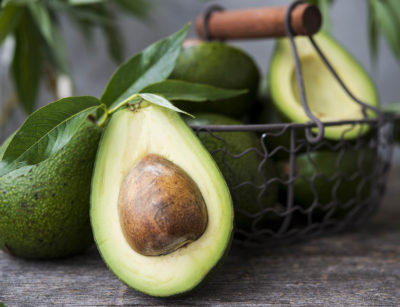
Who doesn’t love a big bowl of homemade guacamole? And it’s even better when it comes from your own yard! If you’re thinking about growing an avocado tree, here’s a brief guide to the basics.
Do you need more than one? With some other types of fruit trees, you absolutely need more than one in order to successfully cross pollinate them. That approach can be helpful with avocado trees, but is not always necessary.
Avocados are classified into Type A and Type B subspecies. If you can, plant a Type A and a Type B. The Type A female flowers open at the same time as Type B male flowers, and vice versa. This can lead to a more successful pollination, and therefore more fruit.
However, if space is limited, you can plant only one avocado tree and still enjoy a decent harvest from it. And if nearby neighbors also have avocado trees, everyone will enjoy plenty of cross pollination.
What about the cold? Avocado trees definitely prefer environments free of frost, which is not a big problem here in Southern California. However, there are cold-hardy varieties available, if you’re worried about the rare cold snap: Mexicola Grande, Bacon,Joey, Opal (aka Lila), Brogdon, Winter Mexican, Wilma (aka Brazos), Belle, and Fuerte.
Cold hardiness mostly applies to mature trees. For the first 3-5 years, protect saplings by keeping them in large pots and moving indoors if temperatures drop below freezing.
Can you grow an avocado tree from a pit? Technically, yes, you can grow an avocado tree from the pit of an avocado that you’ve eaten. But are you prepared to wait ten to fifteen years for it to bear fruit? If not, then we would advise you to purchase a nursery-grown sapling, which will begin producing fruit within a few years.
How much water do avocado trees need? Many avocado growers say that water is the most important factor in their success! Trees planted in sandy soil will need more frequent waterings, whereas those in clay soils need less frequent waterings to prevent excess moisture. Generally speaking, you should deeply water young trees twice a week and mature trees once per week. If you’re getting a lot of rain, you don’t need to water your avocado tree at all.
Anything else? Yes! Because avocado trees grow wide but shallow root systems, they very much appreciate a thick layer of mulch! This will help the soil to retain more moisture, and keep the tree from drying out.
If you’re considering the addition of some trees, give us a call. We can help you by designing a landscape that provides both beauty and value to your home.
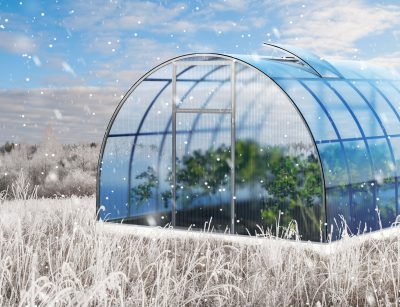
As you might have noticed from weather reports around the country, winter has fully arrived! Of course, for those of us in Southern California, winter just doesn’t mean the same thing as it does elsewhere. So when it comes to winter gardening, you might have a few questions.
Can I plant spring bulbs yet? Yes! In fact, please hurry. In our growing zone, spring bulbs should be planted in December or the first few weeks of January.
Examine bulbs first, and discard any that are mushy, moldy, or smelly. You can also float test them, by tossing the bulbs in a bucket of water. Healthy bulbs should sink to the bottom; throw away the ones that float.
Ideally, bulbs should chill in the refrigerator for four to six weeks before planting. But if you’ve skipped this step, rest assured you can still get acceptable results from your bulbs.
Where did my bulbs go? If you dig around in your garden only to discover that previously planted bulbs have disappeared, they could have been eaten by moles. But the most common culprit is overly wet conditions. If your flower beds don’t drain as they should, or if you’re overwatering them, bulbs will rot in the ground and you won’t see many blooms in the spring.
Can I prune my roses? Yes! The ideal time to prune roses is when new growth first appears. In warmer climates like ours, that usually means January or so. Cut out all dead wood (it will be brown) and leave the new growth (which will be green). Also make sure to take out branches that grow too closely together, because these impede air flow and encourage disease to spread.
What do I do about my grass? If you have warm season grass, it probably won’t need to be mowed after December. But you might find that you still need to edge and trim occasionally. You might also battle weeds in the usual manner.
As for watering, you can cut down to about half of your usual water amount. Winter is also a great time to test the nutrients in your soil, so that you have a good idea of the amendments needed in spring.
If you have questions about winter gardening, don’t hesitate to reach out to us. We’ll be happy to help you troubleshoot any issues and make a plan for spring.

Most of us want to get into better shape and feel healthier, but not everyone considers themselves a “gym person”. That’s okay! You can still get into great shape by working out at home, or even in the great outdoors. In fact, the extra boost of vitamin D will be good for you.
It might even be possible to create an outdoor exercise space at home. Check out these ideas and see if you feel inspired.
Build a pull-up bar. Pull-ups are one of the best exercises for toning and building strength in your upper body. And luckily, building a pullup bar is a simple task. As an alternative, a set of hanging rings offers similar exercise benefits.
Include a weight bench. A simple wooden weight bench is easily incorporated into your overall landscape, and comes in handy for simple outdoor exercises. Just carry your free weights outside, and enjoy your workout in the fresh air and sunshine.
Consider a sit-up bench. An inclined sit-up bench adds difficulty to typical sit-ups, and will fit right in with the rest of your outdoor gym.
Create a running trail. If you live on a few acres, creating your own gravel or paved running path is easy enough. Or, if you want to minimize impact on your knees, consider a plain dirt trail.
Plan a yoga garden. Any flat, grassy space can be used for practicing yoga outdoors. But the addition of hedges for privacy or a water feature for its soothing effects can take your yoga space to the next level.
And of course, a lot of your workout gear can already be used outdoors. Resistance bands, ankle weights, and other types of equipment can simply be carried out to the lawn and used there. If you anticipate getting super sweaty, or if sunburn concerns you, consider adding shade elements to protect you from direct sun in the summer.
If we can help you develop any of these ideas further, give us a call and we can discuss how to incorporate exercise space into your overall landscape design.

Now that the holidays have come and gone, many of us are feeling the effects of a tad too much indulgence. Between food, drink, and making merry, you probably feel the need for a bit of cleansing in your life. Fortunately, nature provides for that need.
Yes, plants can help us detox our bodies in a number of ways. The primary method, of course, is through the air. Nature has a way of providing balance, and we see that in plant respiration. Plants take in carbon dioxide and produce oxygen, a perfect counterbalance to human respiration which intakes oxygen and gives off carbon dioxide!
But along with that, plants act as a natural filter, ridding the air of numerous toxins. The following houseplants make excellent additions to the home, both for their natural beauty and their air detoxification benefits.
Air plants (Tillandsia)
Peace lilies
Aloe Vera
Dumb cane plant
Dracaena
Parlour palm
Kentia palm
Areca palm
Boston ferns (or sword ferns)
English ivy
Devil’s ivy
Philodendron
Spider plant
Snake plants
Rubber plants (ficus elastica)
Weeping fig
ZZ plants (Zamioculcus Zamiifolia)
And as you might expect, many plants can be used internally to rid your body of toxins. Red clover, burdock, dandelion root, and nettle can all be used in teas or tonics to help flush harmful substances from your blood and organs. These plants can also offer powerful nutritional benefits, and help you look and feel your best.
Each year, we update you on Pantone’s Color of the Year and offer our tips for incorporating the trendy hue in your home and landscape. For 2022, we’re excited to announce Very Peri, a lovely shade of blue with strong purple influence.
As Laurie Pressman, Vice President of the Pantone Color Institute said in a press release:
“The Pantone Color of the Year reflects what is taking place in our global culture, expressing what people are looking for that color can hope to answer. Creating a new color for the first time in the history of our Pantone Color of the Year educational color program reflects the global innovation and transformation taking place. As society continues to recognize color as a critical form of communication, and a way to express and affect ideas and emotions and engage and connect, the complexity of this new red violet infused blue hue highlights the expansive possibilities that lay before us”.
Pantone clearly views Very Peri as the antidote to nearly two years of isolation and transformation. The website states, “Very Peri is a symbol of the global zeitgeist of the moment and the transition we are going through. As we emerge from an intense period of isolation, our notions and standards are changing, and our physical and digital lives have merged in new ways… Very Peri illustrates the fusion of modern life and how color trends in the digital world are being manifested in the physical world and vice versa.”
Fans of both blue and purple certainly have something to celebrate at this moment! Now you have yet another reason to incorporate your favorite cool shades into your landscaping or home interior.
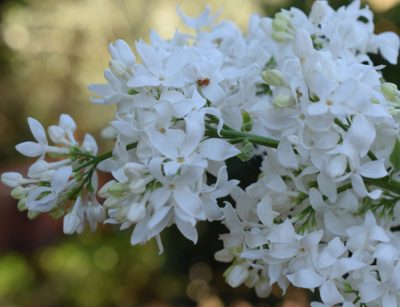
In fact, there is already a species of flower named after this color, called Periwinkles! That might be the most obvious choice for bringing periwinkle into your landscape design, but other types of flowers also display this shade. Look for irises, cornflowers, delphiniums, blue stars, clematis, geraniums, and more.
And if you already have hydrangeas in your yard, adjusting the soil pH can turn the blooms more brilliantly purplish-blue. The more acidic the soil, the more blue the flowers will become.
And of course, you’re not limited to flowers when incorporating a new shade into your indoor or outdoor design. Simply purchasing new throw pillows, a rug, or other accents will allow you to swap out an old look for a new one, without excessive work or expense.
For more help with your landscape design, call us to discuss your ideas. We can assist you in adding new elements to your current yard, keeping the exterior of your home fresh and up to date.
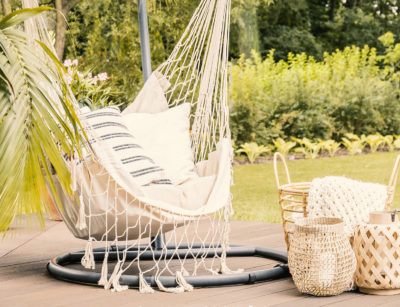
Once your patio, porch, or pool deck is complete, now it’s time to add the finishing touches. You’ll enjoy your new outdoor space so much more when you select furnishings that both appeal to your sense of style while providing comfort. Here’s what you need to know about shopping for outdoor furnishings.
Consider materials. Fully research the different materials available for outdoor furnishings. Everything from wood to metal to plastic is commonly used, and they each have their benefits and drawbacks. Some are heavier than others, so keep that in mind if you plan on moving the furniture frequently. And with regard to cloth materials, remember that anything placed in the sun is likely to fade over time.
Try before you buy. Visit a showroom that allows you to actually sit on models of the outdoor furniture you’re considering. What is comfortable to one person does not work for another, and you’re the one who will be using this furniture most often.
Read online reviews. On the other hand, consulting your favorite home furnishings website can help you investigate the longevity of your options. The reviews section can be illuminating, as current owners offer their feedback. Just remember to look for reviews that mention length of ownership; many new owners are thrilled on the first day, but those who return after one year to leave a positive review carry more credibility.
Think about how you will use the furniture. How many people do you need to regularly accommodate? Will you need extra seating options for parties? Do you need furniture that can be taken apart and rearranged according to changing needs? What about end tables or coffee tables for placing food and drinks? Would some family members prefer a swing to a couch?
Think about the weather. Since outdoor furnishings will be enjoyed outside, consider your own comfort with regard to weather. Would a freestanding heater make your space more enjoyable in cooler weather? What about a mister for those hot, miserable summer days?
Style is personal. Outdoor furnishings vary in style just as much as their indoor counterparts. You can create a variety of stylish environments, from modern to traditional to even a retro look. It’s up to you, depending upon your personal preferences, but consider the outside of your home and how everything will look when put together. And visit more than one showroom, so that you get a good idea of all the options on the market.
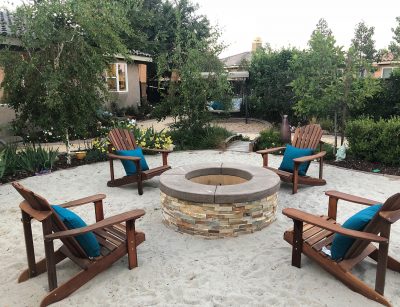
And finally… What the heck is an Adirondack chair? An Adirondack chair is simply a specific style of reclining outdoor chair. It has a downward sloping seat, wide arm rests, and a tall slatted back. You’ve probably seen them in beach locations or arranged around fire pits. And yes, they’re quite comfy! But some people do have a difficult time with their low heights, so Adirondack chairs might not be the best option for those who are older or have mobility problems.
As you consider your outdoor furnishing options, remember we’re here to provide for all of your landscape design needs. Call us when you’re considering a renovation and we can help you from start to finish.
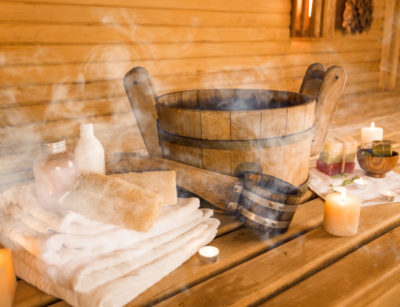
Many of us never experience a sauna unless we visit a spa or a nice hotel. But once there, you find yourself imagining how nice it would be to use a sauna more often. And you can! Backyard saunas are becoming more popular, because you can enjoy the luxurious feeling of a spa without ever leaving home.
Saunas can be purchased pre-built, with different sizes and options available. Generally speaking, most of us don’t have the room for a large sauna inside of our homes. But locating the sauna in your backyard allows for more flexibility, and you can install just about any size you wish.
Saunas tend to be described by the number of persons that can use them at one time. You can purchase sizes ranging from a one-person sauna to an eight-person unit. Before making your final selection, imagine whether you might occasionally use the sauna with guests. It might be worthwhile to go ahead and upgrade to one size larger than you think you need.
Aside from pre-built options, which are available in a variety of shapes, you can also design and build your own. This process will be more complicated, obviously, but it allows you to choose every element of the design.
The main choice to make involves your sauna’s heat source. Will you use a traditional sauna or opt for the infrared heat option? Traditional saunas are heated via a wood stove or electric heater, both of which provide enough heat to generate steam. An infrared sauna uses more updated technology to produce radiant heat. Fans of infrared saunas say your body’s sweating helps you to detox more efficiently.
When choosing a location for your sauna, remember that you will need electricity. Yes, even if you go with the wood stove type, you’ll want a light inside! Since running electrical wiring is a specialized trade, locating your sauna close to the house can keep the work (and cost) to a minimum.
And just a word of caution: Never use any type of paint or stain on the inside of your sauna! Heat can release toxic fumes from these treatments, and your wood might be damaged because humidity becomes trapped. And consult an expert about the placement of a wood stove sauna; the wrong placement can result in a fire.
As always with renovations, check on your local permitting rules before beginning work. You’ll want to be certain your plans are allowable within local restrictions, and that the work is performed according to safety standards.
If you’d like to incorporate an outdoor sauna into your overall landscape design, call us so that we can discuss your plans.

Renovating your home can be an exciting time. Finally, you’ll be getting that dream kitchen, luxurious bathroom, or backyard oasis… But first, you have to survive the chaos. While you’re busy picking out color schemes and finishing touches, take a moment to prepare yourself for the upheaval.
Plan for practical matters. If your kitchen is torn apart, make a plan for meals. If your bathroom is the target of the makeover, do you have a second bathroom you can use? Or can a neighbor offer their facilities?
If you’re renovating the landscape, you might imagine the mess and disruption will be relegated to the yard. But you’ll still be dealing with noise and disruption to your routine. The mess can also migrate inside, via mud, dust, and more. Take the time to anticipate all of the inconveniences that can occur, and make a detailed plan to deal with them ahead of time.
Set up a routine for kids and pets. Kids and pets certainly add another level of excitement to any life change! Quarantine pets in a small, quiet room (away from the noise) if you can. Those who are renovating their yards might consider boarding outdoor pets to prevent stress or unforeseen complications.
Warn the kids about upcoming changes, and keep them on their regular routine as much as possible while renovations proceed.
Expect the unexpected. Most home renovations proceed with some hiccups. In most cases things get back on track quickly, so don’t let emotions overcome you when things don’t go as planned. If you already know delays and complications will occur, you will react more calmly. Trust that your professional contractor knows how to deal with just about anything that comes up.
Focus on the end result. In the middle of a complicated project, you might find yourself wondering, “what have I done?” It might seem as though the disruption never ends. But focus on your goals: How will you feel once the renovation is complete? Picture yourself using the new space and enjoying it.
Consider staying elsewhere. If your home is undergoing major renovations, it might be easier to schedule the work while you’re away on a trip. Or, pack up and spend a week or two with a friend or even in a hotel. You can make it fun and enjoyable by pretending you’re actually on a vacation.
If you’re considering a landscape renovation, give us a call to discuss your ideas. We can help you learn more about what to expect, and explore all of the options available to you.
Topiaries. Perhaps due to the extra time we all spent around the house during the pandemic, hobbies such as topiary design have grown in popularity. We’ve also seen a shift toward more organic shapes within topiary enthusiast circles.
Water gardens and other water features. What did everyone do while spending more time at home in the past year? Many sought to reduce stress and increase tranquility within their environments. The addition of ponds, water gardens, fountains, and other water features became one of the central modes of accomplishing this goal.
Outdoor entertaining spaces. More time at home can leave room for hobbies, but can also get lonely. Over the past year and a half, interest in home entertaining has surged. Landscape design now incorporates more patios, outdoor kitchens, pool decks, and other features that accommodate for social gatherings in the backyard. Front yard patios have enjoyed a resurgence, too, as they allow for greater connection with neighbors.
More vegetable and herb gardens. Home vegetable gardens and interest in local, organic food have been hot topics for the past several years. We see no signs of these trends slowing, especially in light of rising grocery prices. More homeowners will be converting part of their landscapes to vegetable and herb gardens.
Kid-friendly gardens. The rise of homeschooling or distance learning, combined with renewed interest in outdoor hobbies, has produced new kid-friendly themes within home gardening. Creative parents are planting simple flower gardens for the kids to manage, incorporating “fairy gardens” into the landscape, or dedicating portions of veggie gardens for children to learn about food production.
“Wild” gardens. Those who enjoy the look of a more “natural” landscape, yet crave a semblance of structure, are drawn to wild gardens. Dedicate a space for wildflowers, allow them to grow mostly untamed within boundaries, and you can achieve a low-maintenance garden with high visual impact.
Do any of these trends spark your interest? Remember we’re available to consult on new landscape design ideas. Call us to investigate the above trends, and we can help you incorporate fads while maintaining a landscape that stands the test of time.
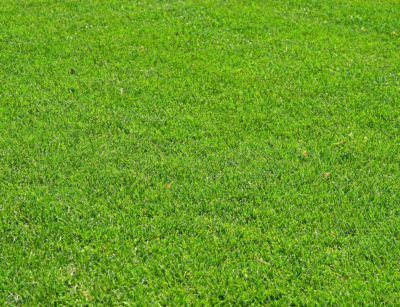
There’s just nothing like a lush carpet of rich green grass. From the curb appeal it provides, to the soft play surface that kids enjoy, Fescue grass fits the bill for many homeowners. But are there other options available to you? And what do they have to provide?
St Augustine. As a semi-dwarf grass, St Augustine grass has a plush appearance without the tendency to become thatchy in hot temperatures. When allowed to grow a bit higher than usual (three to four inches) the soft blades of St Augustine are often confused for Fescue.
Extreme hardiness is the primary benefit of St Augustine grass. If your yard is shady, St Augustine will grow well. In overly hot temperatures and droughts, the deep root system allows this type of grass to survive. And because St Augustine keeps its color, it looks great in a variety of light conditions.
However, St Augustine grass is not the right grass for overseeding.
Bermuda hybrids. If long, dry summers and the frequent droughts of Southern California concern you, a Bermuda hybrid grass might be just the thing to save your lawn (and your water bill). The most tolerant Bermuda hybrids use about 38 percent less water than other types of grass, making them an ideal choice for homeowners who want to limit their water usage. This variety is also quite shade tolerant, meaning it will hold its color and look great well into the cooler seasons.
Bermuda grass is installed via overseeded sod, takes root quickly, and is perfect for a fall installation.
Since Bermuda grass should be kept at half and inch to two inches tall, it will require more dedicated mowing. So keep that in mind as you deliberate between different types of grass for your lawn.
Paspalum. For those who want to try the newest “technology” in lawns, Paspalum grass might provide the answer. Ideal for warm climates, Paspalum provides a bright green color with medium-fine texture that is perfect for golf courses, sports fields, and home lawns alike. Because Paspalum grass was created to use less water and fertilizers, it might be considered ideal for those who want to protect the environment while also creating less work for themselves.
Since Paspalum is a warm-season grass, it does go dormant in the winter. But you can overseed the lawn to keep color at this time. Perhaps the only drawback to Paspalum grass is that it is definitely a full-sun grass, and won’t do well in the shade. So keep that in mind if you plan to install lots of trees and larger shrubs.
Whether you’re building a new home or just considering a new look for your existing lawn, grass might be your first decision. Call us to discuss your options so that you can start off your landscape design with the right lawn for your needs.
Now that fall has arrived, you might have noticed something a bit strange going on. You expect for leaves to change color and drop off of deciduous trees, and for flowers to stop blooming as we head toward the cooler part of the year. And yet, suddenly you’re noticing what looks like a second spring. What’s going on?
It’s not exactly “fake”, nor a second spring that we’re seeing. Instead, it’s simply the natural growing cycle of many plants in very hot environments. Some plants actually enter a dormant phase during the summer, because they cannot tolerate 100-degree temperatures. Some have actually evolved to produce flowers in the fall.
It’s not just plants that respond to cooler temperatures in the fall. Whereas the rest of the country might be heading into their first freezing nights, fall in Southern California is quite pleasant! So now we see birds, insects, and other animals become more active after a period of rest over the summer.
Plants have evolved in response to that activity. Because they depend upon the activity of birds and insects to spread their pollen and/or seeds, summer is not necessarily the ideal time to reproduce. Therefore, many plants adapted to the habits of animals and and learned to attempt reproduction in the fall instead.
So yes, in a way fall can look like a second spring! This happens in Southern California and throughout the Southwest every year. In fact, other areas of the world experience the same phenomena, such as the more temperate areas of the Mediterranean.
Why not take advantage of this “second spring” and spiff up your landscaping? Give us a call to discuss plantings that experience a second growth and reproduction phase in the fall. We’ll help you add them to your current landscape design, so that you can enjoy a more diverse garden every year.
You’ve probably heard that your concrete surfaces must be sealed and resealed on a regular basis. But actually, there are quite a few arguments against this procedure, too! What’s the big debate about, and what are the reasons for not sealing concrete?
You could seal too soon. This might go against your instincts, but you shouldn’t seal brand-new concrete! It needs to “cure” for a while first (at least a month) because it will be very vulnerable to damage otherwise.
Sealing doesn’t fix cracks. If you have cracks in your concrete, sealing won’t do anything for those. You’ll expend money and effort on something that you might rather replace before too much longer.
Sealers fade. The seal on your concrete will fade over time, especially in high-traffic areas. This can lead to an uneven look that bothers you.
You’ll have to maintain it. Once you seal your concrete, you’ll need to reseal it every year. That can add up to another costly chore that you must remember.
Sealers can be slippery. Sealing concrete can create a slippery surface, especially when wet. The last that you want is to place a hazard in your yard where people will be walking! This danger can be particularly common around swimming pools.
Luckily, there are some ways to get around this problem. If you really want to seal your concrete, adding abrasives to the sealer mix can provide more “grip” on the surface.
Some sealers can be dangerous. Most sealers are solvent-based, and contain harsh and potentially toxic chemicals that could be dangerous to humans and pets. In fact, certain safety gear is required of anyone working with these chemicals. Safer, more environmentally-friendly sealers are available on the market, but they cost a bit more.
Sealing doesn’t change the structure of concrete. Sealing doesn’t do anything to make concrete stronger or more durable, since it only protects the surface. So if you’re already dissatisfied with your concrete structure, or feel it needs to be replaced in the near future, why waste the money on sealing it?
Of course, there are plenty of arguments for sealing your concrete! The decision should be based on a number of factors unique to your situation. If you’re trying to decide what to do with a particular hardscape feature, just give us a call. We will help you evaluate it and decide upon the course of action that is right for you.
We all learned about the types of trees in fifth grade science class. Evergreen trees, like pine trees, stay green all year long, while deciduous trees change color in the fall before the leaves drop. But most of us didn’t learn why this occurs, or maybe you’ve forgotten and now you feel curious.
First, let’s back up and discuss why leaves are green. As you know, plants make their own food from sunlight, water, and carbon dioxide from the air. To do this, they use a chemical called chlorophyll, which contains green pigment and gives leaves their usual color.
But other pigments are present in leaves as well, such as carotenes and xanthophyll, which are orange and yellow in color. For much of the year, these pigments are masked by the amount of chlorophyll present in leaves, so we don’t see them. But in the fall, chlorophyll begins to break down. So technically, leaves don’t “change” color exactly; we can just see the other colors that were already present, but masked by large amounts of green chlorophyll.
But why does chlorophyll break down? It’s all part of the life cycle of the tree. The arrival of fall means cooler temperatures and shorter days, and those factors signal to the tree that it’s time to stop making food. Chlorophyll breaks down and other chemical changes occur, such as the development of anthocyanin pigments which are red to purple in color.
So, why do trees change color at slightly different times each year? And why are the colors more brilliant in some years than in others? The timing and brilliance of leaf colors are influenced by temperature, sunlight, and water supply. So weather will play a part in the appearance of fall color each year.
Low temperatures above freezing helps anthocyanins to form, so you’ll see more brilliant reds unless an early frost occurs. And since lack of sunlight helps colors to develop more strongly, lots of overcast or rainy days will contribute to a more spectacular showing of fall leaves.
To experience something truly different, plan an autumn trip to the Northeast someday! But if you want to enjoy more fall color in your own yard, give us a call to discuss which deciduous trees would make good choices for both your landscape and our general climate here in Southern California.

If you’ve suffered through a fire, replacing your home is probably top of mind. But your landscape has suffered, too, and will likely need some rejuvenation. Here’s what you need to know about repairing your landscape after a wildfire or house fire.
Consider erosion control. If your landscape has been devastated by fire, you might soon confront an erosion problem. You must contact a landscape expert right away, before rain arrives, in order to prevent a compounding problem as you rebuild.
Evaluate trees and shrubs. Were your trees and shrubs irreparably damaged by the fire? In some cases there is no doubt about this question. But in other cases, you might feel unsure of whether a particular tree can be saved.
If you believe a tree or shrub can be saved, water it generously and regularly. Often, those with burned foliage are still alive and will begin to produce new growth in three to four months. However, hold off on fertilizing any damaged plants for a bit; they need time to recover.
Make sure to seek a professional opinion before making a decision or cutting down a damaged tree. These situations can be dangerous. On the other hand, leaving a damaged tree in place can also pose a danger!
Repair damaged soil. Soil depends upon a specific microbial balance, and those microbes can succumb to the extreme heat of a fire. Fires also “glaze” the surface, by quite literally melting the soil so that it repels water. It will need significant repair in most circumstances.
An application of compost and organic fertilizers is necessary to restore proper balance. These items must be tilled into the soil.
Replant. As you replant shrubs and gardens, add mycorrhizal fungi to each planting hole. These fungi form a symbiotic relationship with plant roots, helping them to absorb nutrients and water, and are a part of the essential microbial balance of the soil.
Reseeding. After the soil has been repaired, you can reseed with your preferred grass or native wildflowers. You might also consider a low-water landscape, or alternative groundcovers instead of grass.
Consider firescaping. As you replant your landscaping, consider firescaping principles which can reduce the risk of another devastating fire in the future.
What about hardscape? In many cases, your hardscape, such as patios and retaining walls, will just need a good washing to remove soot and ash. But if you suspect structural damage, we should inspect everything and help you decide what to do about repairs or replacements.
As difficult as a fire event can be, it also presents you an opportunity for rejuvenation. If there was anything about your lawn that you always wanted to change, now is your chance. Give us a call to discuss your landscaping design ideas, and we can help you transform your yard into the lawn of your dreams.
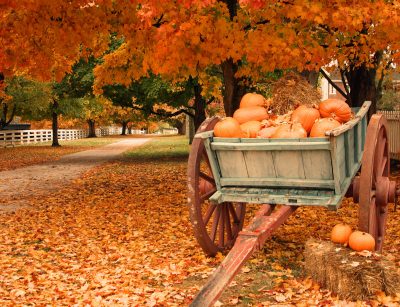
Visiting a nearby pumpkin patch has become a fall tradition for many families. But wouldn’t it be fun to grow your own? All you need is a little garden space, and you can grow your own pumpkin patch to enjoy next autumn!
Consider varieties carefully. There are over 100 different varieties of pumpkins, and you might be surprised at how versatile they are? Ask yourself about your goals. Do you want to carve pumpkins to be used at porch decorations in the fall? Do you want to make pies? Some large pumpkins are ideal for carving, but are not very tasty. Likewise, some of the sweetest pumpkins, ideal for making pies and other dishes, are not the best for carving.
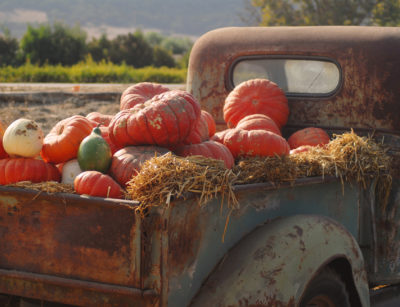
Do you enjoy the unusual and unique? Pumpkins come in all shapes and many more colors than you might imagine. Yes, there are even white, blue, and green pumpkin varieties that can make your fall decorations really stand out!
When to plant. Pumpkins mature at different rates, but many varieties require well over 100 days. So if you want to harvest your pumpkins in October, put your seedlings in the ground by the early summer. Of course, allowing them to grow a bit longer can help to ensure larger pumpkins.
Pumpkins are susceptible to powdery mildew, so spritz your plants with a neem oil solution at the first sign of a problem.
Support your pumpkins. With pumpkins, you have two choices: Let the vines sprawl on the ground, or support them with a trellis or even individual hammocks.
For large pumpkins, you probably don’t want to bother supporting them. Their weight will pull down almost anything you will construct. But turning them regularly as they grow can prevent lopsided shapes.
Smaller pumpkins can be grown on supports, and you can really get creative with this. Supports can be purely practical, or you can construct a “pumpkin tunnel” in which pumpkins hang like lanterns!
If your garden is on the smaller side, you probably want to go with a smaller pumpkin variety that you can train to a trellis. Individual hammocks can help the pumpkins to grow into perfectly pleasing shapes.
What about ornamental gourds? Ornamental gourds aren’t edible, but they grow into interesting shapes and serve numerous purposes. If you’re strictly interested in the decorative aspect of pumpkins, gourds can become a fun hobby. Hollow them out, paint them, display them, or use them for a variety of other purposes. Their hard shells help them to last for years.
For more information on fitting a garden space into your landscape, give us a call. We can help you with information on soil conditions, building support structures, and much more.